10th grade karyotype printable worksheets give biology teachers a concrete entry point into chromosomal inheritance — the kind of visual, hands-on analysis that Punnett squares alone cannot deliver. Students move from abstract inheritance ratios to actual chromosomal structures, identifying homologous pairs, centromere positions, and the banding patterns that distinguish chromosome 6 from chromosome 7.
Concepts in Each Worksheet
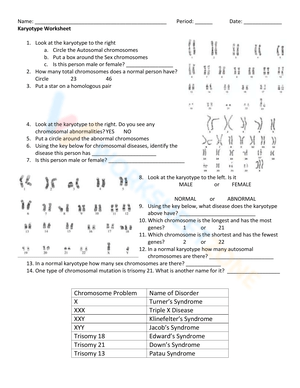
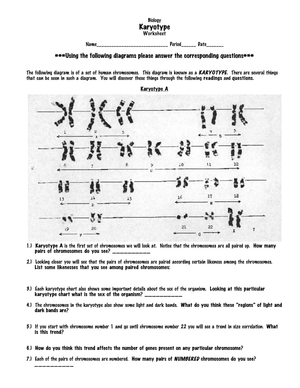
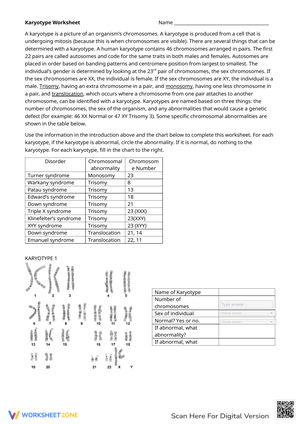
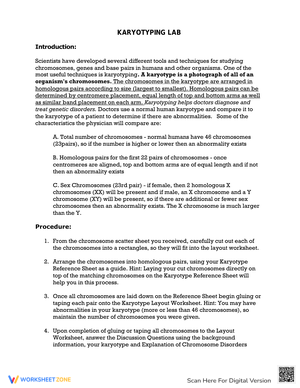
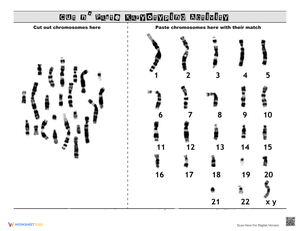
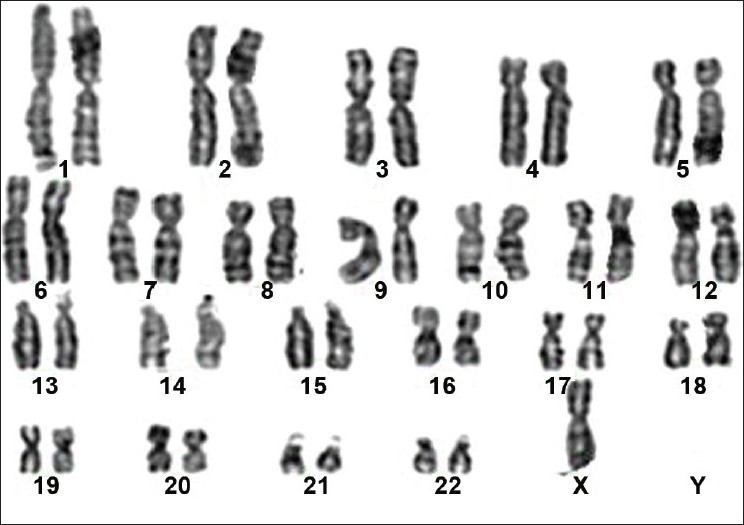
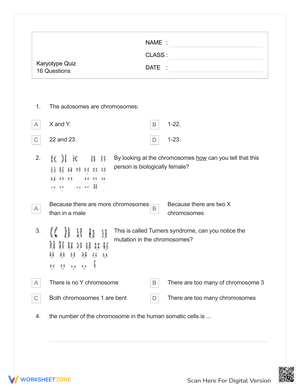
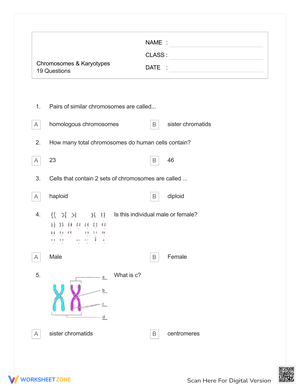
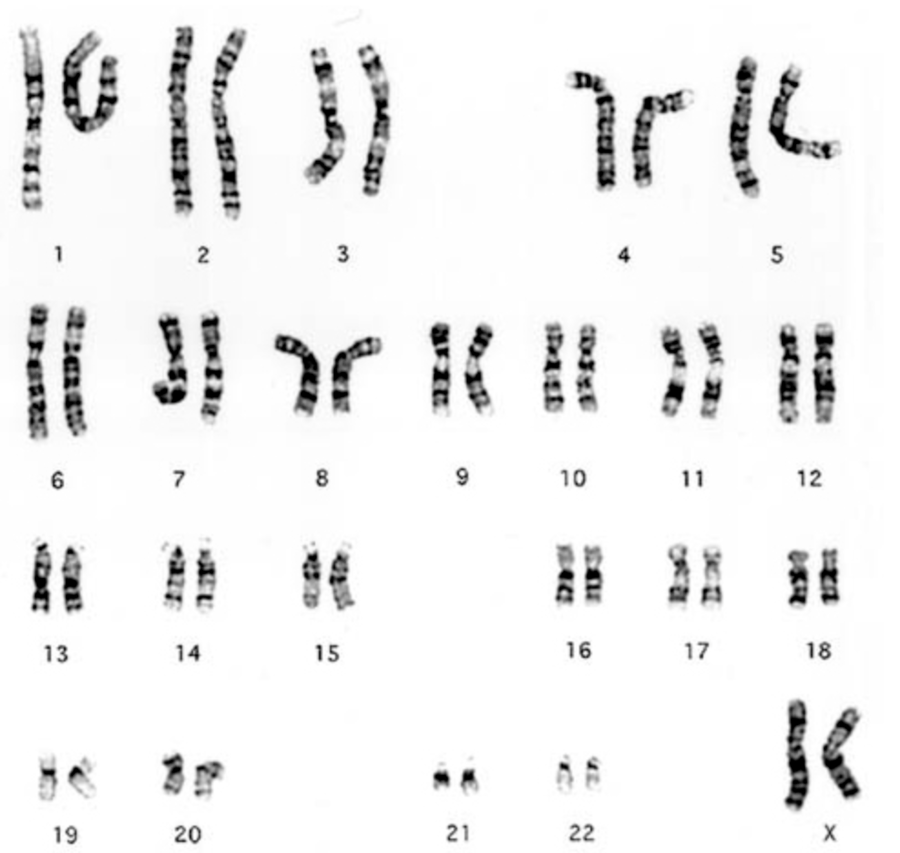
The core task across the set is matching — pairing homologous chromosomes by overall length, centromere position (metacentric, submetacentric, or acrocentric), and the distinct dark-and-light banding pattern produced by Giemsa staining. After assembling a complete 46-chromosome profile, students identify the 23rd pair to determine biological sex, then look for numerical abnormalities that signal non-disjunction errors during meiosis.
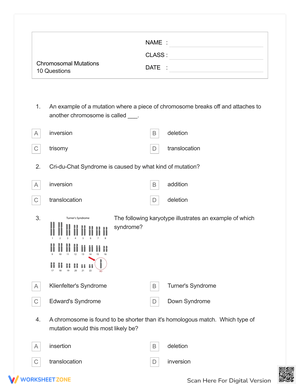
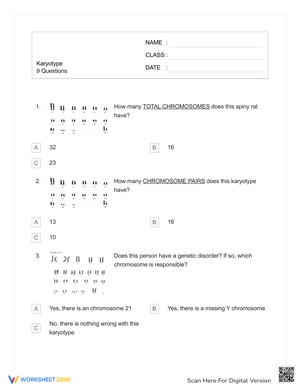
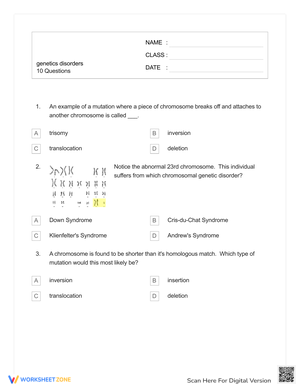
Several worksheets present case-study karyotypes with deliberate errors built in. Students write brief diagnostic reports naming the abnormality — Trisomy 21, Turner syndrome (45,X), Klinefelter syndrome (47,XXY) — and connect the chromosomal picture to the specific meiotic failure that produced it. That analytical writing step is what separates these from identification-only exercises. A student who can mark "extra chromosome on pair 21" and then explain the failure of homolog separation in meiosis I is reasoning at a meaningfully higher level.
At least one worksheet in the set bridges into sex-linked trait analysis, using the karyotype as a starting point for discussing X-linked inheritance. This connects naturally to pedigree work in subsequent lessons, so the visual vocabulary students build here does not sit in isolation.
Student Error Patterns Worth Anticipating
The most persistent error is over-reliance on length alone when matching chromosomes. The size difference between pairs 4 and 5, or between pairs 9 and 10, is subtle enough that students who skip banding analysis consistently swap them. You will see this in finished products where the pairs look plausible at a glance but fall apart under the banding key. A short banding-pattern tutorial during the warm-up saves a lot of backtracking once students are already mid-activity.
A second pattern: students regularly misread monosomy as a normal karyotype because they count 46 chromosomes and stop. In a Turner syndrome worksheet (45,X), one sex chromosome is absent — but students who scan for total chromosome count rather than systematically checking each numbered pair miss it entirely. Requiring students to verify each pair against a numbered chart, rather than just tallying, catches this reliably.
There is also a consistent conceptual error around the 23rd pair. Students who correctly know that XY = male will sometimes still mark a karyotype showing a single X chromosome as "female (XX)" because they assume the second sex chromosome must exist somewhere. Walking through what monosomy physically looks like — one chromosome, no partner — usually resolves it, but it has to be addressed directly before students attempt the diagnostic reporting task.
Fitting These Worksheets Into Your Genetics Unit
These resources land most effectively after students have worked through meiosis and before the class moves into genetic disorders at the population level. The sequencing matters: students need a working model of how homologs separate during cell division before a karyotype showing trisomy can mean anything to them. Introduce one worksheet too early and it becomes a matching puzzle with no mechanistic explanation behind it.
The cut-and-paste format works well as a 40-minute lab-day activity, but logistics deserve some planning. Having students work on dark construction paper or a felt mat solves the problem of small chromosome cutouts sliding off desks — the contrast and surface texture both help. Keep a correctly assembled reference karyotype visible at the front of the room. Students should still do the matching independently, but having a finished example reduces the anxiety spiral that eats time when someone has lost one piece and cannot figure out where the gap is.
The analytical worksheets — where the karyotype is pre-arranged and students write diagnostic reports — work well as a follow-up lesson or as a formative check before the genetic disorders unit. They also function as strong Monday review after a weekend, since the visual format re-anchors students in the material without a full re-teach. 10th grade karyotype printable worksheets in the diagnostic-report format take roughly 25 minutes and generate written evidence you can scan quickly during class.
Standard Alignment
These resources align directly with NGSS HS-LS3-1 (Heredity: Inheritance and Variation of Traits), which asks students to clarify relationships about the role of DNA and chromosomes in coding instructions for traits passed from parents to offspring. Karyotype analysis delivers exactly the kind of visual, evidence-based data that standard calls students to interpret. The diagnostic-report writing component also addresses the NGSS science and engineering practice of constructing explanations — students are not just labeling what they observe but explaining the cellular mechanism behind it. Teachers in states using the Next Generation Science Standards can use a completed, annotated karyotype chart as a tangible artifact for HS-LS3-1 evidence documentation.
Adjusting the Resources Across Ability Levels
For students who struggle with fine motor control or freeze when confronted with 46 individual chromosome cutouts, pre-place half the chromosomes on the chart before printing. Pairs 1 through 11 are the larger, easier-to-distinguish chromosomes; leaving those in place and asking students to position pairs 12 through 22 plus the sex chromosomes keeps the task manageable without removing the analytical demand entirely.
10th grade karyotype printable worksheets in the standard format carry real visual density — 46 chromosomes on one worksheet is a lot to process. Enlarging each worksheet on a copier, or offering a magnifying glass for banding-pattern comparisons, addresses the perceptual challenge without changing the intellectual task itself.
For students who move through the matching quickly, the most effective extension is not a harder matching task — it is asking them to work backward. Provide a brief clinical description ("patient presents with short stature, webbed neck, and absence of secondary sex characteristics") and ask them to sketch the karyotype they would expect to find. That reversal forces genuine conceptual understanding rather than pattern recognition.
Frequently Asked Questions
Do these worksheets cover only human karyotypes, or do any include non-human examples?
The set focuses on human karyotypes, which fits the HS-LS3 standards context and the clinical framing most 10th-grade genetics units use. A few worksheets introduce comparison prompts — asking students why an organism with 8 chromosomes or 38 chromosomes can still be healthy — but the core matching and diagnostic work is built around the standard 46-chromosome human profile.
Can these worksheets substitute for a digital karyotyping simulation?
They serve a different purpose. Digital simulations let students drag and drop with unlimited undo options; the printable format requires commitment — once a chromosome is glued down, a student has to examine the error and explain what went wrong. That accountability is useful. The two formats complement each other well when sequenced: printable work first to build careful visual analysis habits, digital simulation as a follow-up for speed and additional case variety.
How many case-study karyotypes are included in the set?
Most versions of 10th grade karyotype printable worksheets in this set include at least four distinct case studies: one normal female, one normal male, one trisomy case, and one monosomy or sex chromosome aneuploidy. Some versions add a structural abnormality — a deletion or translocation — as a challenge case. Check the individual worksheet descriptions for exact case counts before ordering.
What prior knowledge do students need before starting these activities?
Students should be able to describe the basic stages of meiosis and explain what non-disjunction means at the cellular level. Without that foundation, the diagnostic-report tasks become vocabulary exercises rather than conceptual reasoning. A 10-minute meiosis review at the start of the first karyotype lesson is usually sufficient if students covered cell division earlier in the unit.