These hamstring muscles worksheets pdf give anatomy and health science teachers a set of diagram-based and text-based practice tools organized around one of the most consistently misunderstood muscle groups in the lower body. Each worksheet targets a distinct layer of content — location, naming, function, or movement application — rather than cramming everything into a single dense activity. Teachers get printable resources that sequence logically inside a muscular system or human body unit.
The Anatomy These Worksheets Cover
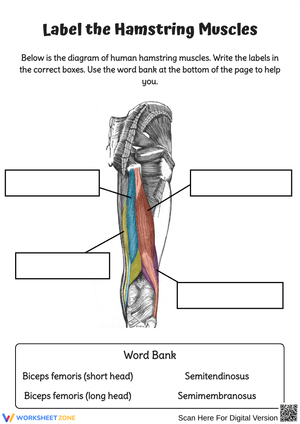
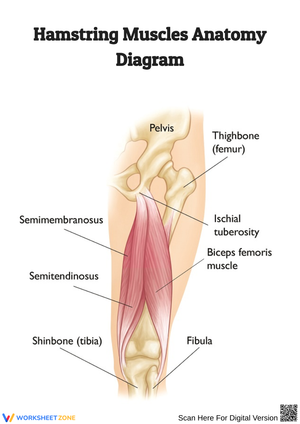
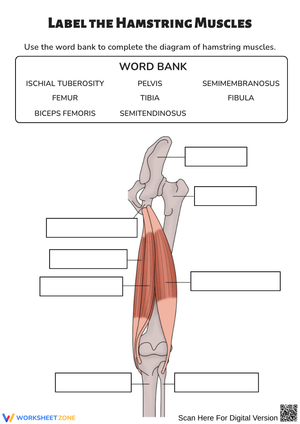
The hamstrings are three muscles — the biceps femoris, semitendinosus, and semimembranosus — that run along the back of the thigh. All three cross both the hip joint and the knee joint, producing two primary actions: knee flexion and hip extension. That dual-joint role is the anatomical fact most students encounter with genuine surprise. Most arrive expecting a single muscle with a single job, and the set corrects that assumption systematically. Across the worksheets, students:
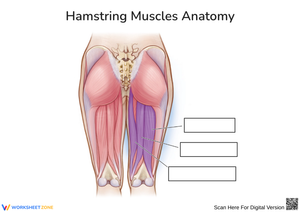
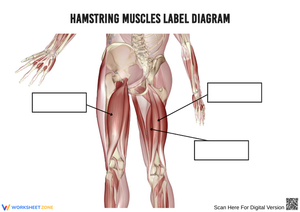
- label all three hamstring muscles on a posterior thigh diagram
- match each muscle's name to its position and general attachment site
- identify whether a described movement involves knee flexion, hip extension, or both
- contrast the hamstrings and quadriceps as opposing groups acting on the same joints
- explain why sprinting places greater demand on the hamstrings than walking does
The hamstring-quadriceps contrast is worth building out intentionally. Students who understand that these two groups pull in opposite directions across the knee — and that the hamstrings also influence the hip in a way the quadriceps do not — retain the functional information far longer than students who encounter each muscle group in a standalone lesson.
Student Error Patterns Worth Anticipating
The most reliable error in hamstring labeling tasks is the confusion between biceps femoris and the arm's biceps muscle. Students see the shared term "biceps" and mentally file the hamstring muscle in the wrong region. On a diagram, they either skip the label or place it on the anterior thigh. The fix is simple: draw explicit attention to the word "femoris" — from the Latin for femur — so students anchor the name to the thighbone rather than to the arm.
A second error pattern involves knee flexion. Students consistently interpret "flex the knee" as forward knee movement, imagining a squat, rather than the heel traveling toward the glutes. When they write function descriptions, this misread produces answers like "pushes the knee forward" or "straightens the leg." Having students stand, draw their heel toward the back of their thigh, and then write the label immediately afterward eliminates this error for most of the class. The worksheets include movement prompts that create that same mental image on paper.
How to Work These Worksheets Into a Unit Plan
Three placements consistently work well. First, as a direct-instruction follow-up: students have just watched an annotated diagram on the projector, and the worksheet asks them to reproduce that annotation independently — activating the information while it is still in working memory. Second, as a station inside a body-systems rotation, where one table handles diagram labeling, another handles movement matching, and a third works through an injury-application short response. Third, as a Monday retrieval exercise after a Friday introduction — the one-to-three day gap before retrieval practice produces stronger retention than re-reading on the same day, and five to eight minutes at the start of class is enough to run it effectively.
One instructional move that consistently improves accuracy before any function question: ask students to draw a colored line from where the hamstrings attach above the knee to where they attach near the hip. Students who trace that path across both joints answer questions about dual-joint function with noticeably more precision than students who read the same information in a sentence. It turns an abstract anatomical fact into a physical mark on the page.
Standard Alignment
These worksheets align to NGSS MS-LS1-3, which asks middle school students to use evidence to argue that body structures function together to support the life of an organism. The hamstrings make that standard concrete: three named muscles, two joints, one coordinated movement pattern that students can observe in their own bodies. The worksheets also address content covered under most state health science and physical education standards at grades 5–8, particularly those dealing with body systems, movement physiology, and injury awareness.
Differentiating the Set Across Ability Levels
For students who need more language support, introduce the muscle group as a whole before naming all three muscles individually. The three Latin terms — biceps femoris, semitendinosus, and semimembranosus — carry real cognitive load, and students who are still building science vocabulary benefit from meeting the location and function before tackling full nomenclature. A word bank in the worksheet header removes retrieval pressure while keeping the identification task scientifically intact.
Students who are ready to go further handle application questions well: Why does the semitendinosus have a long tendon you can feel behind the knee? Why does sprinting — rather than steady jogging — produce the most hamstring strains? These questions move from recall into causal reasoning, which is where NGSS and most state assessments push students at the upper grades. A hamstring muscles worksheets pdf set that spans both levels of demand gives one resource that genuinely serves the full room without requiring separate materials for separate groups.
Frequently Asked Questions
What grade levels are these worksheets designed for?
The core content fits most comfortably at grades 6–8, where human body systems appear in both science and health curricula. High school anatomy, sports medicine, or kinesiology courses can use the same worksheets with a deeper application layer added — biomechanical analysis, muscle fiber type discussion, or tissue-level injury mechanism. The labeling and matching tasks hold up at both levels; the short-response prompts determine grade appropriateness.
Can these worksheets be used in PE or health class, not just science?
A hamstring muscles worksheets pdf resource grounds movement concepts in actual anatomy, which gives PE and health teachers a text-based tool to pair with physical demonstration. That combination — seeing the structure, naming it, then feeling it activate during a movement — is more durable than either approach alone. Units on warm-up physiology, injury prevention, or safe sports movement all have a natural entry point here.
How long does a typical worksheet take to complete?
A labeling and matching worksheet runs 10–15 minutes for most students in grades 6–8. Short-response worksheets that ask students to connect function to movement scenarios — or to explain why a hamstring strain happens during acceleration rather than steady jogging — take closer to 20 minutes, particularly if teachers build in partner discussion time. Add five minutes for younger students or those working without a word bank.
Do the worksheets come with answer keys?
Each worksheet pairs with a corresponding answer key. For labeling tasks, the key marks the standard anatomical placement of all three muscles on the posterior thigh. For short-response items, the key provides a model answer that works as a rubric anchor — not a verbatim expected response, but a clear example of complete reasoning. A complete hamstring muscles worksheets pdf set always pairs student pages with teacher-facing materials so grading and feedback take less time.