What Bean Plant Life Cycle Worksheets Actually Teach
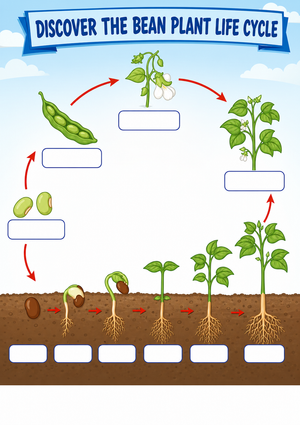
Bean plant life cycle worksheets give students a structured way to label, sequence, and track how a single seed grows into a flowering plant. In most US classrooms these printables fit a grade 2-3 science unit, and they work best paired with a real bean sprouting in a clear cup on the windowsill. Because a bean seed germinates in roughly 5-10 days, a worksheet packet gives your class something concrete to complete while the live plant catches up.
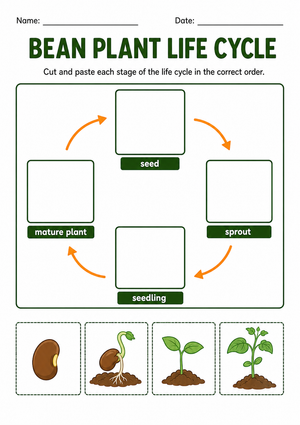
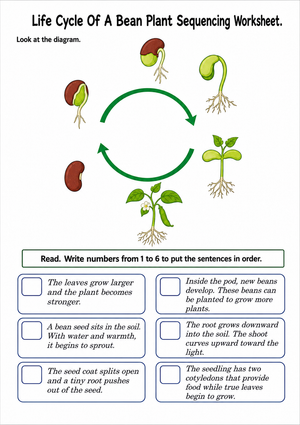
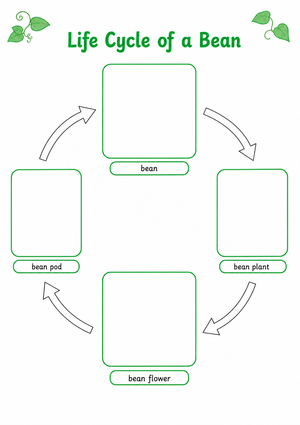
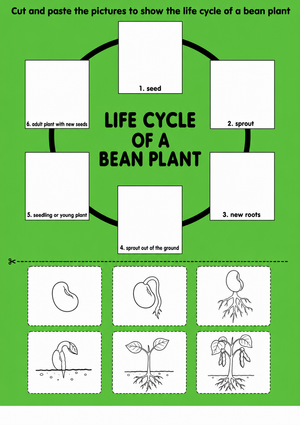
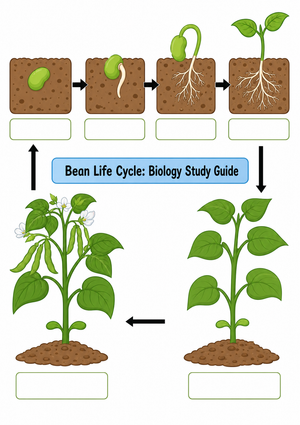
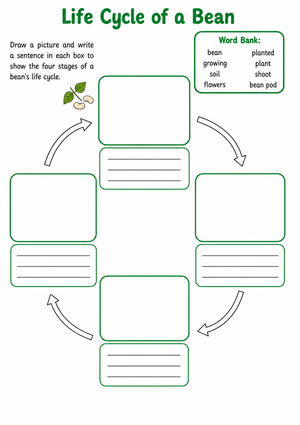
The strongest packets include a labeling page, a cut-and-paste sequencing activity, and a blank diagram students fill in from memory. Together those formats move students from recognition to recall, which is exactly the progression you want across a two- to three-week unit.
Bean is the classic choice for this unit for a reason. The seed is large enough for small hands to plant, it sprouts fast enough to hold a young student's attention, and the stages are visually distinct. That makes the worksheet's diagrams easy to match to the real plant, so students aren't guessing at what a seedling or a cotyledon looks like.
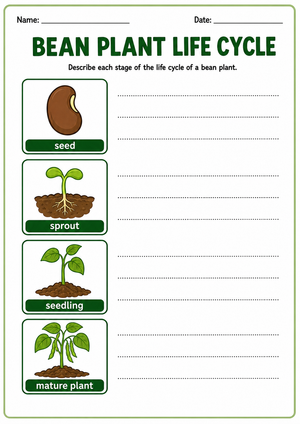
The Four Stages Students Will Label
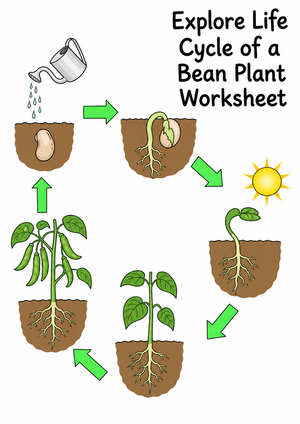
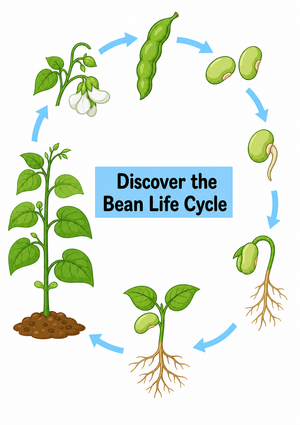
Most bean life cycle worksheets center on four stages, so it helps to name them the same way every time you talk about the plant:
- Seed - the dry bean before planting, holding the embryo and stored food.
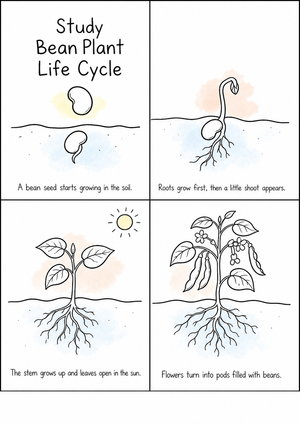
- Germination - the root emerges first, then the shoot pushes up toward the surface.
- Seedling and leaf growth - the first leaves, called cotyledons, unfold and start capturing sunlight.
- Flowering and pod formation - the mature plant flowers and forms seed pods, restarting the cycle.
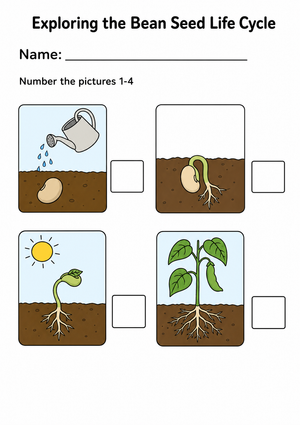
One detail worth reinforcing on the worksheet: the root always appears before the shoot. Students often assume the green part comes first because that is what they can see, so a sequencing page that separates root and shoot corrects that misconception early. Adding a simple root-then-shoot arrow to the diagram makes the order impossible to miss.
Pairing Worksheets With a Classroom Growing Journal
Worksheets stick better when students watch the process happen. Plant two or three beans in clear cups against the glass so roots are visible, and have students log what they see every day. A simple observation journal with a date, a drawing, and a measurement column mirrors the stages on the printable.
Give the journal a predictable structure so students know what to record without a lot of reminders. Three columns work well: what day it is, a quick sketch of the plant, and the height in centimeters. When the roots first appear, when the shoot breaks the surface, and when the first true leaves open, have students flag it on the worksheet so the printable and the live plant stay in sync.
Timing is where most units drift. A bean seed needs soil temperatures between 70-90°F to germinate reliably, and full maturity with flowering arrives about 6-8 weeks after germination. That gap matters for planning: if you want students to observe flowering before the unit ends, start the beans four to six weeks ahead of the life cycle lessons, not on the same day you hand out the worksheet.
Classroom Implementation
Here is a sequence that keeps the printables and the live plant working together:
- Front-load vocabulary (root, shoot, cotyledon, germination, pod) with a labeling page before planting.
- Plant beans in clear cups and start a daily observation journal.
- Use the sequencing worksheet mid-unit, once germination is visible, to check stage order.
- Assign the blank diagram at the end as a formative check of vocabulary and sequence.
For a quick grade, the blank diagram tells you in one glance whether a student can both name and order the stages without prompts. That makes it a cleaner assessment than a matching page, where students can guess from position.
If you teach on a fixed science block, budget the printables around the plant, not the calendar. The labeling page can go any time, but hold the sequencing worksheet until germination is actually visible so students verify the order against something real. Save the blank diagram for the week the plant flowers or forms a pod, when the full cycle is fresh and students can complete it from memory.
Aligning Bean Worksheets to NGSS 3-LS1-1
A bean plant unit maps directly onto a third-grade life science standard. Have students use the completed worksheet to build a labeled model or diagram of the full cycle, which is the kind of evidence the standard asks for.
According to the Next Generation Science Standards, performance expectation 3-LS1-1 asks third graders to develop models describing that organisms have unique and diverse life cycles, and it limits plant assessment to flowering plants. Bean plants qualify, which makes them a clean, standards-aligned choice for a grade 3 life cycle model.
Framing the worksheet as model-building, rather than a fill-in-the-blank page, is what pushes it from a recall task into standards-aligned evidence you can point to during a walkthrough or a data meeting. It also gives you a ready artifact for a portfolio or a student-led conference.
A Cross-Curricular Math Tie-In
The observation journal doubles as a math activity. Have students measure plant height every few days in centimeters and record it, then plot the numbers on a simple bar or line chart at the end of the unit. Now the same bean supports both the science life cycle worksheet and grade-level measurement and data practice, which is an easy way to protect science time in a packed schedule.
For students who finish early, a short prediction task extends the data work: ask them to estimate how tall the plant will be in three more days, then check the actual measurement against their guess. It keeps fast finishers engaged and quietly builds the habit of using data to reason, all inside the same life cycle unit.
Comparing two plants grown in different light also opens a short discussion about what the plant needs, without pulling focus from the core life cycle sequence.
Frequently Asked Questions
1. How many stages are in a bean plant's life cycle and what are they called?
Most classroom worksheets use four stages: seed, germination, seedling and leaf growth, and flowering with seed pod formation. Naming them consistently helps students sequence the cycle and see that the pod returns the plant to seeds.
2. How long does it take a bean seed to germinate and to flower?
Germination usually takes about 5-10 days with warm soil, and the plant reaches maturity and begins flowering roughly 6-8 weeks after germination. Start beans several weeks before your life cycle lessons so students can observe the later stages.
3. What grade and standard does a bean life cycle unit fit?
It fits most cleanly in grade 3 science and aligns with NGSS 3-LS1-1, which covers plant and animal life cycles and limits plant assessment to flowering plants like beans.
4. How can teachers pair these worksheets with a real growing activity?
Plant beans in clear cups so roots are visible, keep a daily observation journal, and use the worksheet stages as the checkpoints students look for as the plant grows.
5. What vocabulary should students know first?
Front-load root, shoot, cotyledon, germination, seedling, and pod. Pre-teaching these words before the sequencing page is the single biggest predictor of whether students finish it independently.












 Interactive Worksheet Maker
 Quiz Maker
 Word Search Maker
 Crossword Puzzle Maker
 Word Scramble Generator
 Sentence Scramble Generator
 Handwriting Worksheet Generator
 Name Tracing Generator
 Fill In The Blank Generator