Where the Oak Tree Life Cycle Fits in Your Science Unit
If you teach elementary life science, the oak tree life cycle is one of the most useful models you can put in front of students. It follows the same four-stage pattern found in every plant unit, but on a scale that surprises kids: a single acorn can grow into a tree that lives for centuries. This page explains each stage in plain, teacher-friendly language and shows how to turn life cycle of an oak tree worksheets into sequencing, labeling, and vocabulary practice you can use right away, whether you are planning whole-group instruction, small-group intervention, or independent review.
Most classrooms meet the oak somewhere in grades 2 through 3, usually right after growing a fast plant like a bean or a sunflower. The timing is deliberate. Students already know a life cycle moves through stages, so the oak stretches those stages across decades and gives you a richer example to compare and contrast. It also links naturally to seasons, ecosystems, and animal behavior, which makes it a strong anchor for a full week of lessons rather than a single handout.
The Four Stages of an Oak Tree Life Cycle
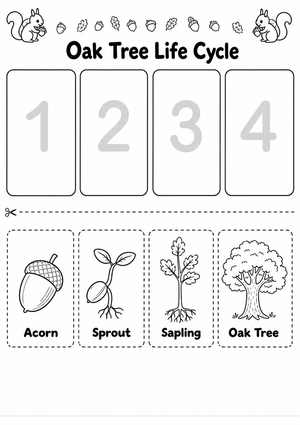
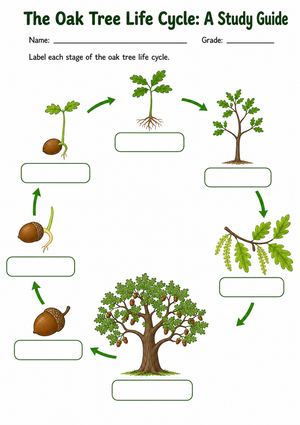
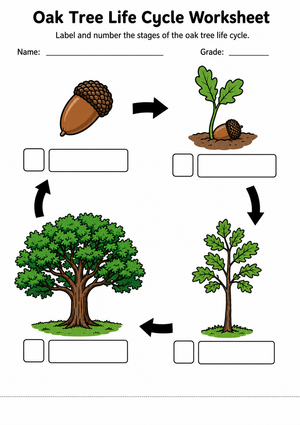
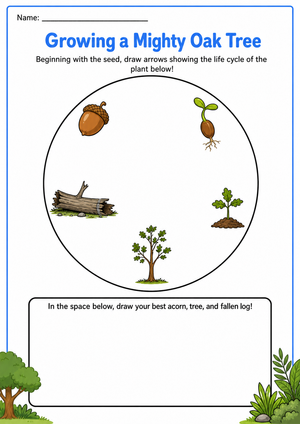
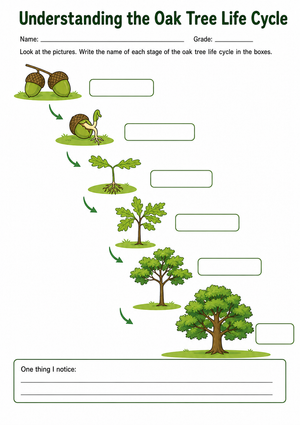
Worksheets on this topic almost always sequence the same four stages. Keeping the vocabulary consistent across every handout helps students transfer what they learn from one activity to the next.
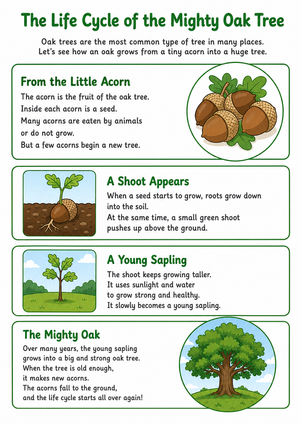
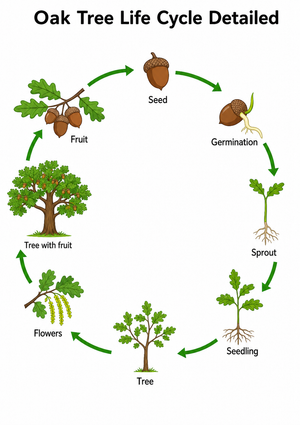
- Acorn (seed): The oak begins as an acorn, a seed with a hard protective shell and a stored food supply that fuels the plant's earliest growth.
- Germination and seedling: Given moisture and warmth, the acorn germinates in about two to three weeks. The root pushes downward first, then a shoot rises toward the light and the first leaves unfold.
- Sapling: The young tree, now called a sapling, grows taller and thicker each year as it builds the trunk, bark, and branch structure it needs to survive.
- Mature oak: After many years the mature tree flowers and produces its own acorns, which drop, spread, and start the cycle over again.
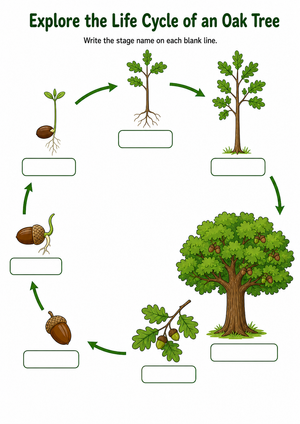
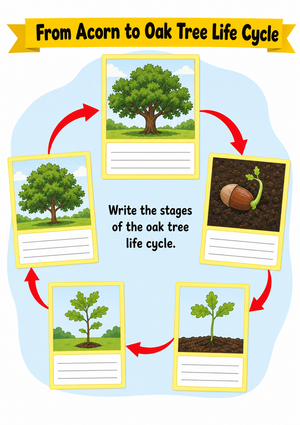
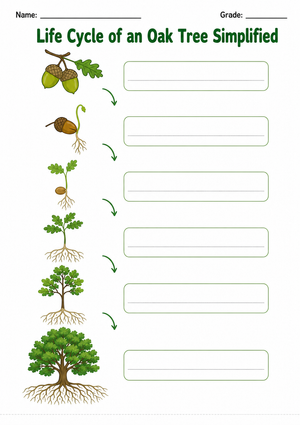
A labeling worksheet asks students to place these four terms on a diagram, while a cut-and-paste sheet asks them to put the same stages in order. Both target the identical idea, which lets you change the format for different learners without changing the science underneath. That flexibility is what makes this topic so easy to differentiate.
Why the Oak Is a Powerful Comparison Plant
The oak earns its place in the curriculum because its timeline looks nothing like the plants students grow on a windowsill. A bean sprouts in days and finishes its whole cycle in a single season. An oak takes far, far longer, and that contrast is the actual lesson you want students to walk away with.
Here is the detail that makes students lean in: an oak can stay in the sapling stage for 20 to 30 years or more before it produces its very first acorn, and a mature tree may live anywhere from 80 to well over 1,000 years depending on the species. Setting a germination stage measured in weeks beside a sapling stage measured in decades gives learners a concrete, memorable sense that life cycle length varies by organism. That reasoning, rather than memorizing labels, is the thinking skill grade-level standards actually reward.
Connecting Oak Worksheets to NGSS
Because the oak models growth, reproduction, and the basic needs of a living thing, it maps cleanly onto the life science expectations most US states have adopted.
According to the Next Generation Science Standards, disciplinary core idea LS1.B, Growth and Development of Organisms, students should model that plants have unique and diverse life cycles but all share birth, growth, reproduction, and death. The oak's roughly four-stage cycle gives teachers a concrete, memorable model for that expectation in grade 3 classrooms.
Seed dispersal offers a second natural link. More than 100 animal species eat and move acorns, so squirrels and jays become a built-in bridge from the oak life cycle to lessons on how plants depend on animals to scatter their seeds. A single worksheet can end with a prompt asking students to explain that relationship in their own words.
Classroom Implementation
Here are practical ways to move oak tree worksheets off the page and into instruction across a full week.
- Whole-group sequencing: Project a four-stage sheet and order the stages together, asking students to defend each move with a reason before you paste the next card.
- Small-group intervention: Use a simplified three-stage version with students who need support, focusing on acorn, sapling, and mature tree before adding germination.
- Science journals: Have students glue a completed diagram into a journal and write one sentence per stage using the target vocabulary.
- Observation walk: If oaks grow near your school, collect acorns in fall, compare their sizes, and revisit the same trees across seasons.
- Vocabulary practice: Build a word wall with acorn, germinate, sapling, and mature so the terms show up in speaking and writing all unit.
The goal across all of these is repetition with variety. When students meet the same four stages in a sequencing task, a journal entry, and a walk outside, the vocabulary moves from the worksheet into their own explanations.
Differentiation Ideas by Grade Band
One topic can serve several grade levels when you adjust the task instead of the science.
- Grades K-1: Offer a three-stage cut-and-paste with large pictures and few words so early readers can succeed independently.
- Grades 2-3: Use labeled diagram worksheets with the full four-stage vocabulary and a short "what happens next" prompt.
- Grades 4-5: Add short-answer questions on why the oak's timeline differs from a bean's, plus a seed-dispersal explanation.
Because the underlying stages never change, you can hand three different versions to three groups and still run one class discussion at the end.
Common Misconceptions to Watch For
A few predictable misunderstandings show up every year, and naming them ahead of time makes your worksheets more effective.
- An acorn is just a nut, not a seed. Students often expect a seed to look like a bean, so clarify that the acorn is the seed structure that grows into the tree.
- The tree makes acorns right away. Many kids assume a young tree produces acorns quickly, so emphasize the long sapling stage until the timeline sticks.
- Every stage looks like a smaller tree. Show real images so students see how different an acorn, a seedling, and a sapling actually appear.
Addressing these directly, and choosing worksheets with realistic images, prevents the shortcuts that otherwise show up on end-of-unit assessments.
Frequently Asked Questions
1. How many stages are in the oak tree life cycle?
Most classroom worksheets use four stages: acorn, germination and seedling, sapling, and mature oak. Some K-1 versions simplify this to three stages by combining germination with the seedling step.
2. What grade level teaches the oak tree life cycle?
It usually appears in grades 2 and 3 during plant and animal life cycle units, though simplified versions work in kindergarten and richer ones extend into grades 4 and 5.
3. How long does it take an acorn to germinate?
Under warm, moist conditions an acorn typically germinates in about two to three weeks, with the root emerging before the shoot. Producing a first acorn, though, can take 20 to 30 years or more.
4. How can I use these worksheets for differentiated instruction?
Keep the science constant and change the format: three-stage cut-and-paste for early grades, labeled diagrams for grades 2-3, and short-answer or comparison prompts for grades 4-5.
5. How does the oak life cycle connect to science standards?
It supports NGSS disciplinary core idea LS1.B, Growth and Development of Organisms, by giving students a clear model of how a plant grows, matures, and reproduces over time.












 Interactive Worksheet Maker
 Quiz Maker
 Word Search Maker
 Crossword Puzzle Maker
 Word Scramble Generator
 Sentence Scramble Generator
 Handwriting Worksheet Generator
 Name Tracing Generator
 Fill In The Blank Generator