Why earthworm dissection worksheet?
If your life science or biology class has never held a scalpel, the earthworm is the specimen most teachers reach for first. It's small, inexpensive, and its body is built from repeating segments that students can count and observe without a microscope. That visible segmentation gives beginners an early win: they can identify real structures within the first few minutes, which builds the confidence they need before moving on to more complex specimens later in the year. A good set of earthworm dissection worksheets turns that specimen into a guided lesson instead of a loose activity.
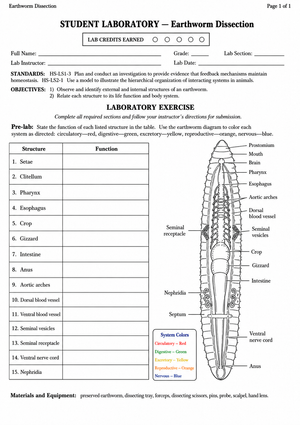
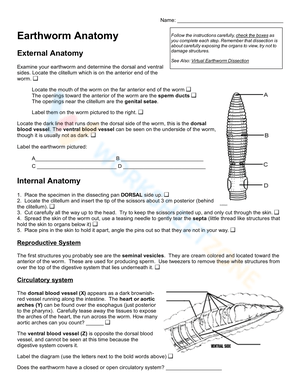
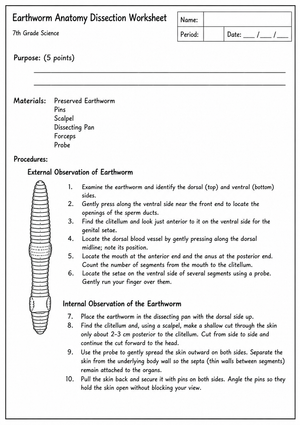
The worksheets in this space usually pair three things: a fill-in diagram for labeling, a step-by-step dissection procedure, and analysis questions on the digestive and circulatory systems. Used together, they let you assess what students actually understand rather than whether they finished cutting. Below is how to sequence external anatomy, internal anatomy, safety setup, and differentiation so a single class period runs cleanly and every pair leaves with the same core vocabulary.
External anatomy students label first
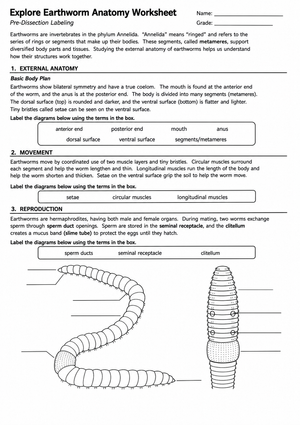
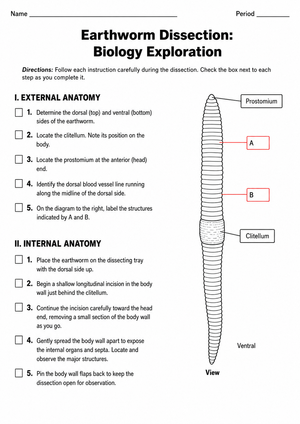
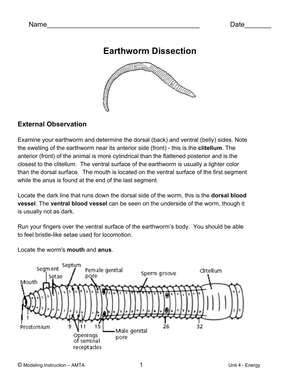
Start every earthworm lab on the outside of the specimen, before any cutting begins. Students should locate and label the clitellum, the smooth swollen band closer to the anterior end that plays a role in reproduction. Have them run a finger along the ventral surface to feel the setae, the tiny bristles the worm uses to grip soil and move. Counting segments and finding the mouth and anus at opposite ends gives students orientation, so they know which end to pin and where to make the first incision.
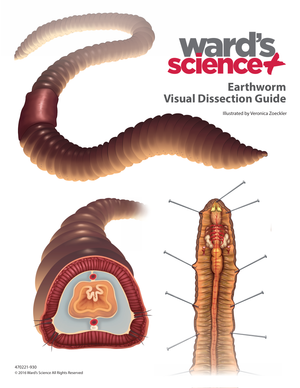
Pin the worm dorsal side up with the darker surface facing you, since the first incision runs along the top and correct pinning keeps the internal organs intact for identification. Asking students to sketch and annotate the external view on their worksheet first is worth the extra few minutes. It slows the class down, forces close observation, and creates a baseline drawing they can compare against the internal structures once the body wall is opened. Biology Corner and Biology Junction both organize their guides this way, moving from external orientation to internal identification.
Internal anatomy: digestive and circulatory systems
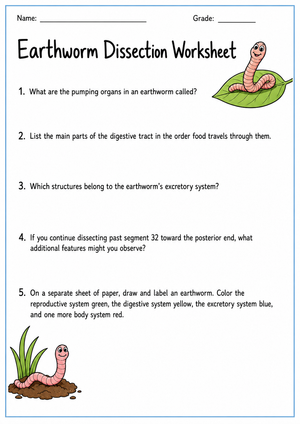
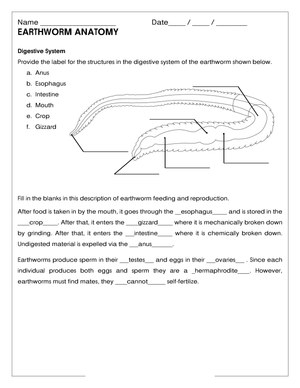
Once the body wall is pinned back, the digestive tract is the clearest system to trace. Students follow food from the mouth through the pharynx, then to the crop, where food is stored, and the gizzard, where it's ground up, before it passes through the long intestine that runs the length of the worm. Labeling these in order on the worksheet reinforces that digestion is a sequence of specialized organs, not a single structure, and it gives you a quick way to check whether students can read the anatomy from anterior to posterior.
The circulatory system is where the earthworm surprises students. Near the anterior end sit the aortic arches, often called the worm's five pseudo-hearts because there are five paired vessels that pump blood through the closed circulatory system. Pointing this out turns a labeling task into a genuine discussion: students expect one heart and find five, which is a memorable hook for teaching that body plans don't always match human anatomy. Have students count the arches themselves rather than reading the number off a key.
Setting up a safe dissection lab station
Safety setup should be visible before students walk in. Each station needs safety goggles, gloves, and a lab apron, plus dissection-only tools kept separate from anything used near food. Set up workspaces away from eating areas, and plan for biohazard disposal of specimens at the end of the period rather than the regular trash. A quick station checklist taped to each table keeps pairs accountable for their own gear and tools before the first incision.
According to the Carolina Knowledge Center, the earthworm's simple external segmentation and low cost make it an ideal first dissection, and a standard classroom BioKit is sized for roughly 30 students working in pairs, with a teacher's manual and reproducible student guide included for a single lab period.
Using These Worksheets In Real Classes
Differentiate the lab with the worksheet rather than the specimen. Open with a pre-lab prediction: ask students to guess how many hearts a worm has or how food moves through its body, then have them check those predictions after the dissection. During the lab, a guided diagram with a word bank supports students who need scaffolding, while an unlabeled diagram challenges students who are ready to work from memory.
Group students in pairs so one reads the procedure aloud while the other handles the tools, then have them switch at the halfway point. Post-lab analysis questions on the digestive and circulatory systems work well as an exit ticket or a formative check the next day. If you teach multiple sections, a reproducible student guide keeps every class working from the same steps and vocabulary, which makes grading and reteaching far simpler across a busy week.
Budget the time realistically. A first-time class usually needs a full 45-minute period once you include setup, the dissection itself, and cleanup, so front-load the external labeling as pre-lab work the day before if your periods run short.
Frequently Asked Questions
1. What grade level is earthworm dissection appropriate for?
It's most common in middle school life science and introductory high school biology. Because the external segmentation is easy to observe and the specimen is inexpensive, it works well as a first dissection for classes that have never done lab dissection before.
2. What safety equipment do teachers need before the lab?
Plan for safety goggles, gloves, and a lab apron at every station, dissection-only tools kept away from food areas, and a biohazard disposal plan for specimens. A workspace separate from eating areas keeps the lab safe and easy to clean up.
3. Which internal and external structures should students label?
Externally, students should find the clitellum, setae, and body segmentation. Internally, they should trace the pharynx, crop, gizzard, and intestine of the digestive system and identify the aortic arches of the circulatory system.
4. How long does an earthworm dissection lab take?
A first-time class usually needs a full 45-minute period once setup, dissection, and cleanup are included. Moving external labeling to pre-lab work the day before helps shorter periods stay on schedule.
5. What should teachers do with specimens and tools afterward?
Dispose of specimens as biohazard waste rather than in the regular trash, and clean and store dissection-only tools separately from anything used near food. A tear-down checklist at each station keeps cleanup consistent across pairs.












 Interactive Worksheet Maker
 Quiz Maker
 Word Search Maker
 Crossword Puzzle Maker
 Word Scramble Generator
 Sentence Scramble Generator
 Handwriting Worksheet Generator
 Name Tracing Generator
 Fill In The Blank Generator