What a Parts of a Pumpkin Worksheet Actually Teaches
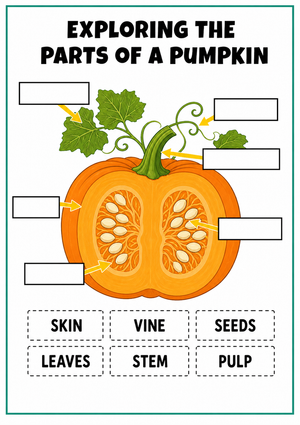
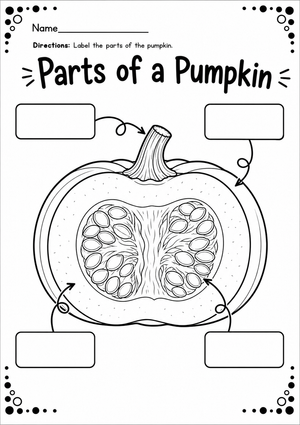
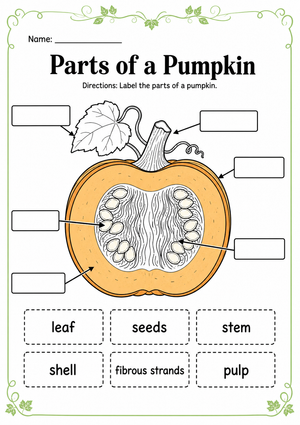
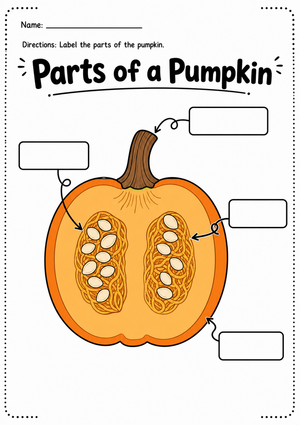
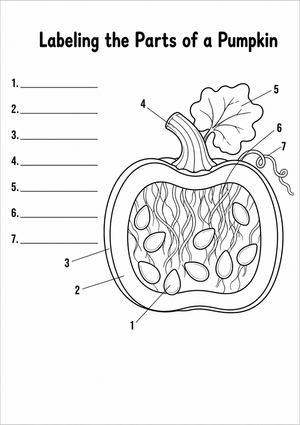
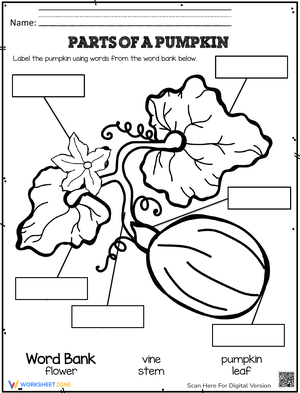
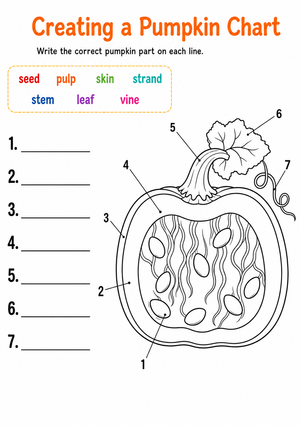
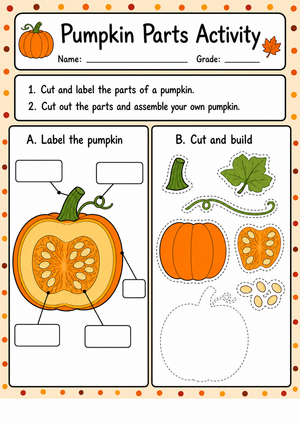
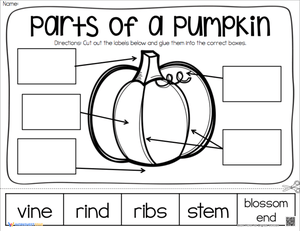
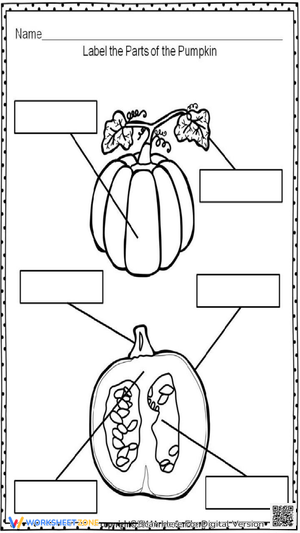
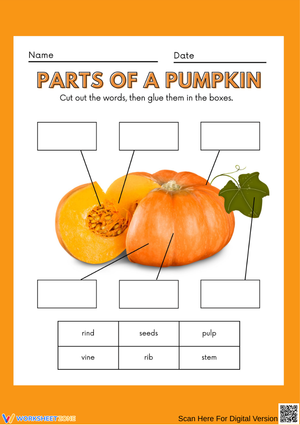
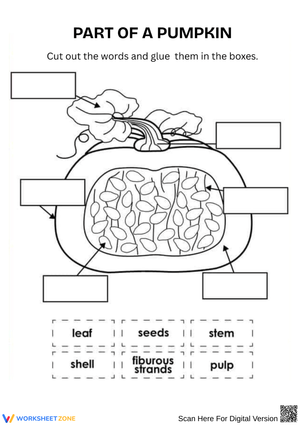
By late October, most K-2 classrooms already have a pumpkin sitting on the counter, so the timing is perfect for a plant-anatomy lesson that feels seasonal instead of abstract. A parts of a pumpkin worksheet gives students a labeled diagram to work from, turning a familiar fall object into a science specimen. Instead of memorizing plant vocabulary in isolation, kids connect words like stem, vine, leaf, skin, pulp, and seeds to something they can see, hold, and smell.
The worksheet does three jobs at once. It builds academic vocabulary, it reinforces the idea that a pumpkin is a fruit that grows on a vine, and it hands you a quick artifact you can file as evidence of learning. For teachers juggling a packed fall calendar, that efficiency matters as much as the seasonal hook. You get a print-and-go activity that still ties back to real plant-science content, not just a coloring page.
It also lowers the barrier for students who freeze at unfamiliar science words. Because nearly every child has seen a pumpkin, the diagram starts from prior knowledge instead of a blank slate, and that head start is exactly what English learners and hesitant readers need before you introduce tougher plant-structure terms later in the year.
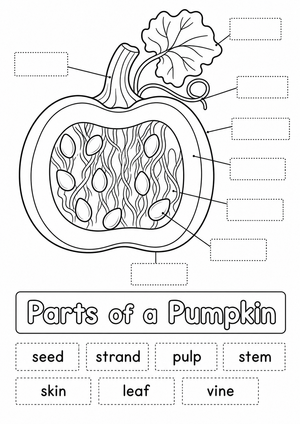
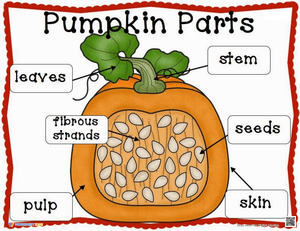
The Six Pumpkin Parts Students Label
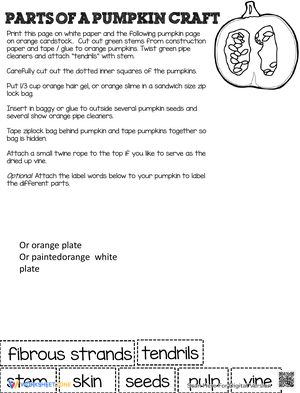
Most printable diagrams focus on six core parts, and each one maps to a job the plant performs. Walking students through the function behind each label is what moves the lesson past rote naming.
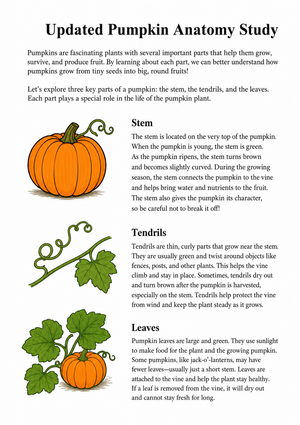
- Stem: the tough handle on top that anchors and supports the pumpkin as it grows heavier.
- Vine: the long runner that transports water and nutrients from the plant to the developing fruit.
- Leaf: the broad, green surface that absorbs sunlight so the plant can make food through photosynthesis.
- Skin: the hard outer rind that protects everything inside from weather and pests.
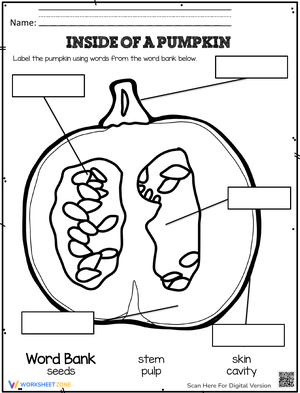
- Pulp: the stringy orange flesh that fills the hollow interior.
- Seeds: the flat white kernels tucked in the pulp that can grow into brand-new pumpkin plants.
When students can explain that the vine carries water or that seeds start the next generation, they're demonstrating the external-structures thinking that early elementary science standards ask for. The pumpkin is just the friendly delivery vehicle.
How the Worksheet Aligns to Science Standards
A pumpkin diagram is not a throwaway craft. It slots directly into the plant-structure work that Kindergarten and first grade teachers are already responsible for teaching, which makes it easy to defend on a lesson plan.
According to the Next Generation Science Standards, performance expectation 1-LS1-1 asks students to use materials to design a solution that mimics how plants and animals use external parts to survive; labeling a pumpkin's stem, vine, and leaves gives K-2 learners a concrete entry point into that standard during a single fall lesson.
Related expectations like K-LS1-1 and 1-LS3-1 extend the same idea toward what plants need to live and how offspring resemble their parents. A pumpkin's seeds make that parent-offspring link visible in a way few other classroom objects can.
Naming the standard on your plans also protects a seasonal lesson during walkthroughs. When an administrator sees pumpkins on the desks, a quick note tying the activity to 1-LS1-1 signals that the fun has a clear instructional purpose behind it.
Pairing Pumpkin Anatomy With the Life Cycle
Anatomy and life cycle are two halves of the same story, so many teachers teach them back-to-back. Once students can name the parts, walk them through how a pumpkin gets there in the first place.
- A seed is planted in warm soil.
- The seed sprouts and pushes up its first leaves.
- A vine grows and spreads across the ground.
- A yellow flower blossoms and is pollinated.
- The flower gives way to a green then orange fruit—the pumpkin itself.
Sequencing those five stages right after the labeling worksheet helps students see that the seeds they just labeled are also where the whole cycle begins. That circular connection is a natural discussion prompt and a strong exit-ticket question.
Classroom Implementation
The worksheet works hardest when it anchors a hands-on station rather than standing alone. Bring in a real pumpkin, cut a lid, and let small groups reach inside to find the pulp and seeds they just labeled on paper. Pair the tactile exploration with the diagram so students move between the concrete object and the abstract label.
Here's the move experienced fall-unit teachers rely on: because the worksheet targets exactly six labeled parts and the life cycle covers five stages, you can build a single week where each day retires one small chunk of vocabulary. That deliberate pacing keeps a high-interest seasonal topic from turning into a vocabulary dump, and it gives struggling readers repeated, low-stakes exposure to the same eleven terms before any assessment.
- Set up a dissection station with gloves, trays, and hand lenses for close observation.
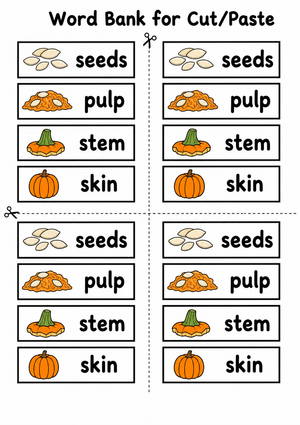
- Use a word bank on the board so early readers can match labels with support.
- Let pre-writers color and point to parts while a partner reads the label aloud.
Differentiation and Formative Assessment
One diagram can serve a wide range of readers if you adjust how students interact with it. For pre-writers, turn the page into a picture-matching or coloring task where they draw a line from each word to the right part. For early readers, use fill-in-the-blank labels with a word bank, and for your most confident students, remove the word bank and ask them to add a sentence about what each part does.
The completed worksheet also doubles as a fast formative checkpoint. Collect it at the end of your fall science block and sort the pile into three stacks—secure, developing, and needs reteaching—based on how many of the six parts each student labeled correctly. That two-minute sort tells you exactly who needs another pass at the vocabulary before you move on to the life-cycle assessment.
Fitting the Worksheet Into a Fall STEM Rotation
A single labeling page rarely fills a whole science block, so most teachers slot it into a rotation of short, connected activities. Think of the worksheet as the anchor station and build three or four quick centers around it that recycle the same vocabulary in different modes. When students hit the words stem, vine, leaf, skin, pulp, and seeds four or five times in one morning, the terms stop feeling like a spelling list and start feeling like tools.
A workable rotation might pair the labeling sheet with a seed-counting math station, a listening center where you read a pumpkin picture book aloud, and a drawing table where students sketch their own pumpkin and label it from memory. Each stop reinforces the anatomy without repeating the exact same task, which keeps engagement high across a group with mixed attention spans. Close the rotation by having students share one fact they learned, giving you a quick oral check before the next day's life-cycle work.
Frequently Asked Questions
1. What are the main parts of a pumpkin students should label?
Most K-2 worksheets focus on six parts: the stem, vine, leaf, skin, pulp, and seeds. Each connects to a plant function—the vine moves water and nutrients, the leaf handles photosynthesis, and the seeds start the next pumpkin plant—so students learn vocabulary and purpose together.
2. What grade levels are pumpkin-parts worksheets appropriate for?
These worksheets fit Kindergarten through second grade best, with light versions working for pre-K. Kindergartners can color and match pictures, while first and second graders can fill in labels and write a short sentence about each part's job, which stretches the same activity across several grade levels.
3. How can teachers pair the worksheet with a hands-on pumpkin exploration?
Cut open a real pumpkin and set up a small-group station with trays, gloves, and hand lenses. Have students find the pulp, count seeds, and feel the skin, then return to the diagram to label what they just handled. Moving between the object and the paper cements the vocabulary.
4. How does labeling a pumpkin connect to plant and life-cycle standards?
Labeling external parts supports NGSS expectations like K-LS1-1 and 1-LS1-1, which focus on how plant structures help organisms survive. Adding the five-stage pumpkin life cycle extends the lesson toward how plants grow and reproduce, letting one seasonal worksheet cover several early elementary science goals.












 Interactive Worksheet Maker
 Quiz Maker
 Word Search Maker
 Crossword Puzzle Maker
 Word Scramble Generator
 Sentence Scramble Generator
 Handwriting Worksheet Generator
 Name Tracing Generator
 Fill In The Blank Generator