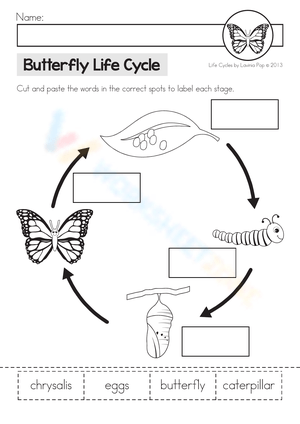
These 2nd grade butterfly life cycle worksheets cover the full arc of complete metamorphosis — egg, larva, chrysalis, adult — through labeling tasks, sequencing activities, vocabulary matching, and brief written responses. The resources lean visual, which is the right call for second grade: students at this level are still developing reading fluency, and a clearly drawn chrysalis diagram lands faster and more reliably than a paragraph describing one.
The Specific Skills Each Worksheet Targets
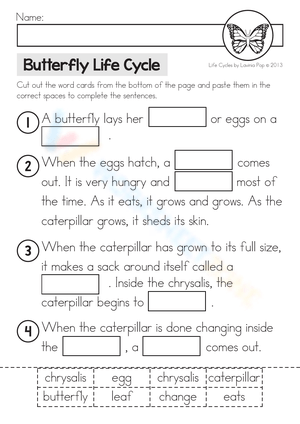
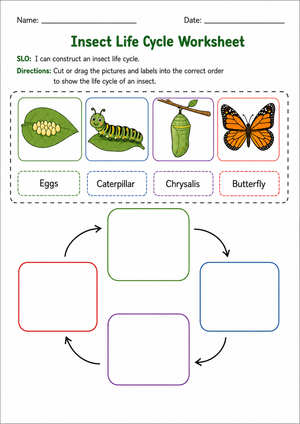
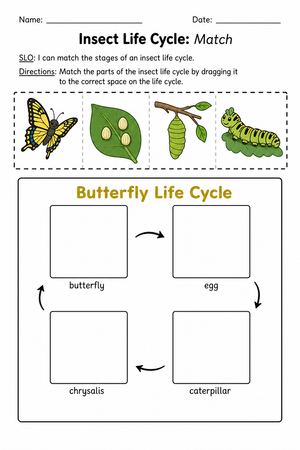
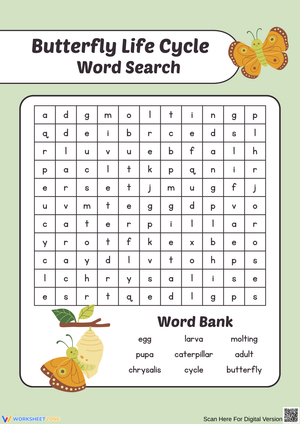
Across the set, students work on three overlapping skill areas. The first is sequencing — understanding that the four stages follow a fixed, repeating order that cycles back to the egg. The second is science vocabulary: terms like metamorphosis, larva, pupa, and chrysalis appear in context throughout the set, and students practice using them to label, match, and complete sentences. The third is close observation — several worksheets ask students to annotate drawings of each stage with physical details, which pushes them beyond memorizing a name list and toward describing what each stage actually looks like.
The sequencing work does double duty. In science, it builds understanding of biological development as a non-linear, repeating pattern. In ELA, it reinforces the same narrative structure students practice when retelling a story using transition words like first, next, and finally. That overlap makes this set natural to use during a cross-curricular unit, and the writing prompts in the set take direct advantage of it.
Misconceptions Worth Catching Before They Calcify
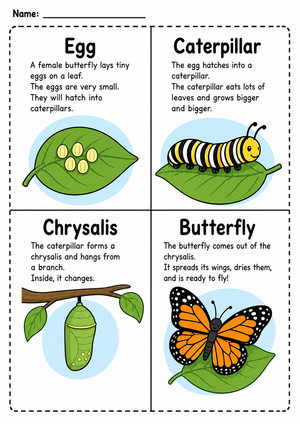
The chrysalis-versus-cocoon confusion is the most reliable misconception in this unit. Students who correctly identify the butterfly's pupa stage will still reach for the word "cocoon" in conversation because it appears constantly in picture books and children's media, applied to butterflies and moths without distinction. 2nd grade butterfly life cycle worksheets that label the structure consistently as a chrysalis — and that include a short annotation task naming the difference — interrupt that pattern before it locks in. It is worth stopping the class to state the distinction plainly: a chrysalis is the caterpillar's own transformed skin, not a silk construction the caterpillar spins around itself.
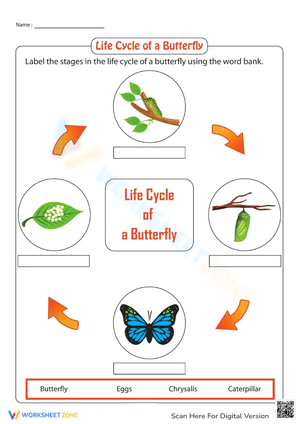
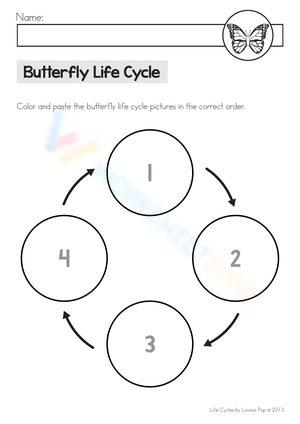
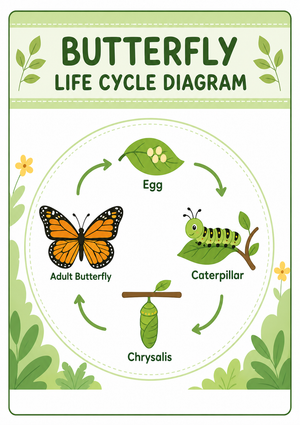
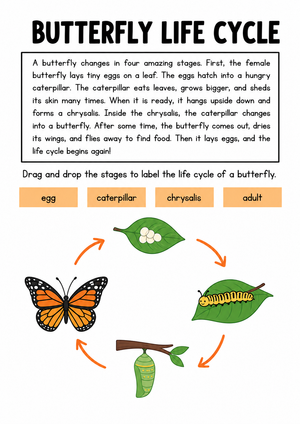
A second error pattern involves the adult stage. Students tend to treat the butterfly as the finished product — the destination — and miss the fact that the adult's primary biological role is reproduction. When a worksheet asks students to explain what the adult butterfly does, many write "it flies" or "it has pretty wings" rather than connecting the adult back to egg-laying and the restart of the cycle. Worksheets that draw the life cycle as a circle rather than a left-to-right progression catch this misunderstanding earlier, because the visual makes the return path to the egg unavoidable.
A smaller but consistent third error: students frequently place molting inside the chrysalis stage rather than the larval stage, because shedding skin sounds more dramatic than eating. When caterpillars are kept in the classroom, this usually corrects itself — watching a caterpillar molt is memorable enough to anchor the fact without further instruction.
Fitting These Worksheets Into Your Butterfly Unit
The most effective use of this set pairs each worksheet with a live observation kit running in the classroom. In that setup, the worksheets function as prediction and documentation tools: students circle which stage the class is currently observing, annotate changes they notice, and then confirm or revise their notes as the insect develops. The labeling worksheet, used this way, becomes a record of what students understood before they watched the chrysalis form — not just a quiz completed after the fact.
Outside of a live-kit setup, the worksheets fit cleanly into several rotation structures. A few that work well in practice:
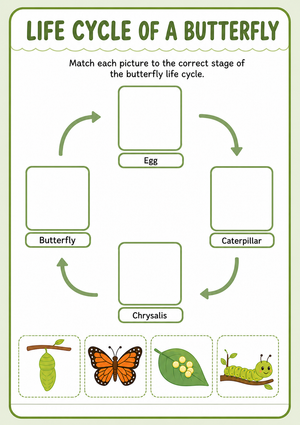
- Monday vocabulary warm-up: The vocabulary-matching worksheet as a five-minute opener at the start of the week, reviewed aloud before the lesson proper begins.
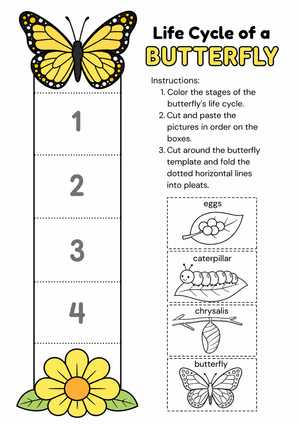
- Science center rotation: The cut-and-paste sequencing worksheet runs independently once students have had initial instruction — it requires no teacher direction and produces a finished artifact for the student portfolio.
- Writing extension: After completing a labeling task, students write a four-sentence paragraph using each stage name exactly once. This works especially well as a Friday consolidating activity, locking the week's vocabulary into context.
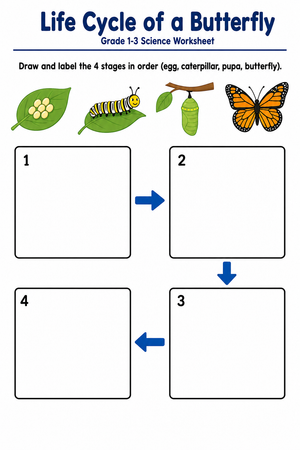
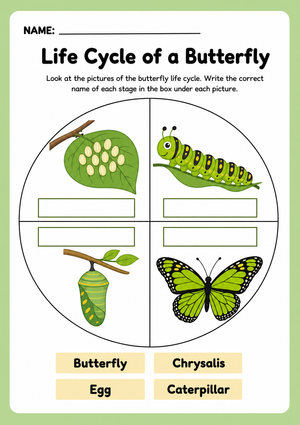
- Exit check: The blank-diagram labeling worksheet, used as a five-minute close to any lesson on metamorphosis, shows quickly which students have all four stages and which are collapsing the pupa and adult into one idea.
2nd grade butterfly life cycle worksheets also pair well with nonfiction read-alouds. After sharing a book like From Caterpillar to Butterfly by Deborah Heiligman, the labeling worksheet gives students an immediate way to organize what they just heard into their own written record. The listening and the writing reinforce each other in a way that either activity alone does not produce.
Standard Alignment
These worksheets connect to NGSS 2-LS4-1, which asks second graders to make observations of plants and animals to compare diversity of life in different habitats. More directly, the sequencing and observation tasks align to disciplinary core idea LS1.B (Growth and Development of Organisms), which specifies that students should understand organisms have unique and diverse life cycles but all share common patterns of birth, growth, reproduction, and death. In classroom terms, this standard typically falls in the spring semester at second grade, when butterfly kits are most in use and the unit can run two to three weeks alongside both science and writing instruction. The vocabulary work on these worksheets also supports the ELA expectation that second graders acquire and use domain-specific words in context — worth noting explicitly when planning across subject areas.
Adjusting the Worksheets for a Range of Learners
For students who need more support, the labeling worksheets become more accessible when the word bank stays visible during the task. Printing a small reference card with each stage name and a thumbnail image — placed beside the worksheet on the desk — reduces the cognitive load of recalling vocabulary and spelling at the same time, so students can focus entirely on matching meaning to image. Students who are still developing written English benefit most from the diagram-heavy worksheets, where circling or pointing substitutes for written responses without reducing the science content being assessed.
2nd grade butterfly life cycle worksheets extend well for students who finish early or are ready for more challenge. Ask those students to annotate the diagram with physical descriptions — "rough, bumpy skin," "j-shaped hang before chrysalis forms," "wing venation still visible through the chrysalis wall" — rather than stage names alone. This shifts the task from recall to observation, which is a more demanding and more authentic science skill. Pairing the completed worksheet with a first-person written narrative from the caterpillar's point of view adds another layer of synthesis that keeps faster finishers productively engaged without requiring entirely separate materials.
Frequently Asked Questions
What is the difference between a chrysalis and a cocoon, and how do I explain it to second graders?
A chrysalis is not something the caterpillar builds — it is the caterpillar's own outer skin, transformed. A cocoon is a silk casing that moth caterpillars spin around themselves. The distinction is worth teaching directly because students hear "cocoon" applied to butterflies constantly in media. A reliable classroom explanation: "Butterflies don't spin anything. The chrysalis grows from the caterpillar's own body." Once students hear it stated that plainly, the distinction tends to hold.
Do these worksheets work without a live butterfly kit?
Yes. Every worksheet in the set functions as a standalone instruction tool — the diagrams carry enough detail that students can complete each task without live observation. That said, a classroom kit deepens what the worksheets accomplish. When students have watched a caterpillar form a chrysalis, the pupa-stage labeling task becomes a record of something they actually witnessed, and the vocabulary becomes considerably more durable as a result.
At what point in the unit should I introduce each worksheet?
It depends on the task type. Vocabulary-matching and overview worksheets work well early in the unit, during initial instruction, giving students something to annotate and return to as understanding grows. Blank-diagram labeling tasks serve better mid-unit, after direct instruction on all four stages. The sequencing tasks are strong at both ends — early, as a pre-assessment to surface what students already know, and late, as a consolidation check that the correct order has been internalized.
How can I use these worksheets to support English Language Learners?
The visual structure of these worksheets makes them more accessible for ELL students than text-heavy assignments. For students in earlier stages of language acquisition, allow drawn responses alongside written ones, and pair any fill-in task with picture support nearby. The core stage vocabulary — egg, larva, pupa, adult — is short and concrete, which makes it manageable as a targeted word study list even for students still building foundational English, especially when the words are anchored to clear images on the same page.