These 2nd grade comparing measurement worksheets build on students' subtraction work in a context that makes the operation feel purposeful — they are not just finding a difference, they are answering a concrete question about two objects they can see or touch. The set includes visual ruler exercises with printed scales, measurement word problems, and prompts that send students to measure actual classroom objects and record the results. Teachers get a range of formats that work differently depending on where each student is in their understanding of standard units.
The Specific Skills Targeted
Each worksheet in the set asks students to do one or more of the following: read a ruler from the zero mark, record a length in whole inches or centimeters, subtract to find the difference between two measurements, or decode comparison language in a word problem. The language piece matters more than it might seem. Second graders frequently understand how to subtract 7 minus 3 but stall when the question reads "how much shorter is the crayon than the pencil?" — because the phrasing asks them to reason from the crayon's perspective, which reverses their usual thinking. These worksheets repeat that phrasing intentionally across multiple problems so students learn to read the question with more precision rather than guessing the operation from context clues.
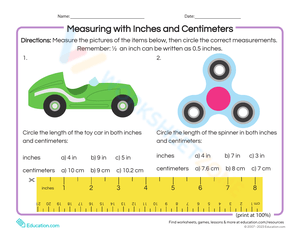
- Visual ruler comparisons: Printed ruler scales appear beneath each pair of illustrated objects. Students read each length, record it, and subtract to find the gap. This format removes physical ruler handling from the task so students can concentrate on reading the scale correctly before adding the motor complexity of measuring with a physical tool.
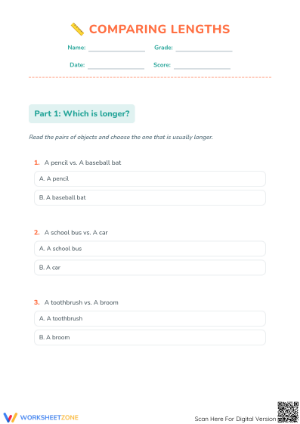
- Measurement word problems: Problems use familiar objects — a pencil, a ribbon, a bookshelf — and require students to interpret comparison language before setting up an equation. Several problems include all three values with one unknown, varying which piece students must solve for.
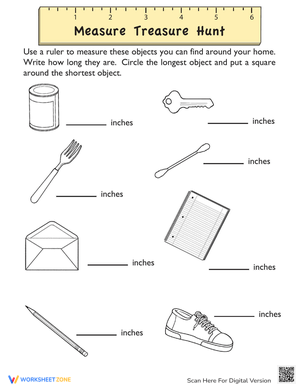
- Classroom object measurement: Students move around the room, measure two items with a physical ruler, record both lengths, and compute the difference on the worksheet. This format works well in a center rotation or as a structured partner task on days that benefit from movement in the math block.
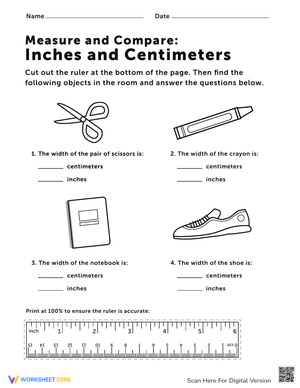
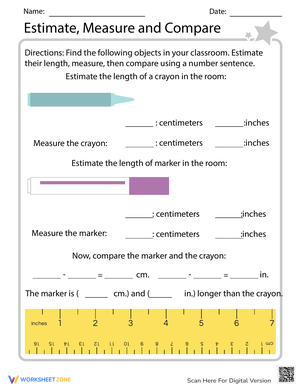
- Unit-awareness tasks: A small number of worksheets ask students to measure the same object in inches and then in centimeters. The goal is not unit conversion — it is noticing that centimeters produce a larger number for the same physical length, which is a source of genuine confusion if left unaddressed.
The Errors That Surface Most Reliably in This Work
The most consistent mistake is measuring from the 1 instead of the 0. Students read a ruler as a number line that starts where the printed numbers start — the blank gap before the 1 registers as empty space, not as the zero point. The error produces measurements that are off by exactly one unit, and because the same mistake applies to both objects being compared, the calculated difference sometimes ends up correct anyway. That accidental accuracy is the problem: students do not catch the misread because their answer seems right.
The second cluster involves subtraction direction in word problems. When a problem asks how much shorter the blue ribbon is than the red ribbon, many students write 4 minus 7, freeze, and then either skip the problem or flip the numbers without understanding why. A quick pre-practice routine — having students underline the subject of the comparison and mark which number they are subtracting from — makes the logical structure visible before the arithmetic begins. Without that step, the same misread repeats across every comparison problem on the worksheet.
A quieter error shows up with the unit-awareness tasks: students who measure a marker at 5 inches and then at 13 centimeters will often decide they have made a mistake, because their working model says "same object, same answer." That belief is worth surfacing in a brief class discussion before students encounter it in print, otherwise they spend their time re-measuring rather than thinking about what the numbers mean.
Where These Worksheets Fit in the Teaching Week
The visual ruler worksheets work best at the start of a measurement unit, when students are still learning to read a scale accurately and are not ready to manage a physical ruler while also thinking about comparison. Once they can read the printed scales reliably — usually after two or three lessons — the classroom object worksheets shift the practice into something more active. They fit naturally into a 15-minute center rotation after the main lesson, or as a partner task on days when the class needs movement woven into the math block.
For the 2nd grade comparing measurement worksheets that focus on word problems, a gradual-release structure works consistently: solve one problem together as a class, have students try the next with a partner while you circulate, then release to independent work. The comparison language — especially "how much less" versus "how much more" — benefits from being unpacked aloud before students encounter it in writing. If these worksheets go home as homework, a brief note to families about what "how much longer" is actually asking prevents the common situation where a parent explains it in a way that contradicts the classroom framing.
One technique worth building into direct instruction before students use any ruler worksheet: demonstrate the counting-up method directly on the ruler scale. A student who measures 5 centimeters and 9 centimeters can place a finger at the 5 and count the marks to 9 — that act of counting is the difference, made physical and visible. Students who understand the arithmetic but lose confidence when the same problem appears in a measurement context often respond to this demonstration in a way that a pencil-and-paper equation alone does not produce.
After the unit wraps, individual comparison problems from the set work well as morning warm-up questions. A single measurement problem as bell work gives a concrete, quickly scored data point on retention — genuinely useful in the two to three weeks between the end of a measurement unit and the start of end-of-year review.
Standard Alignment
These 2nd grade comparing measurement worksheets address Common Core State Standards 2.MD.A.4, which requires students to measure to determine how much longer one object is than another and express that difference in standard length units. In instructional sequence, this standard follows 2.MD.A.1 — measuring individual objects with appropriate tools — which means students need reliable ruler-reading before comparison work begins. Teachers who move to subtraction-of-measurements before students can read a ruler from zero consistently will see arithmetic errors that are actually measurement errors in disguise. The set follows that sequence: printed-scale visual tasks appear before independent physical measurement, and single-comparison problems appear before multi-step word problems.
Differentiating the Set Across Student Levels
Students still working on basic ruler reading benefit from worksheets with printed scales — they can concentrate on the comparison and the subtraction without managing a physical tool at the same time. Keeping the measurements to whole-number inches for these students reduces cognitive load without removing the comparison task itself.
Students who have moved past basic comparison are ready for half-unit measurements and multi-step problems: measure three objects, order them from shortest to longest, and find the difference between the endpoints. A scavenger hunt variation — find an object that is exactly three inches longer than your pencil — requires students to work backward from a target difference, which is noticeably harder than the forward direction and makes a strong discussion prompt. Students who find multiple qualifying objects are doing more sophisticated spatial reasoning than those who stop after finding one, and that distinction is worth naming aloud.
For students who are below grade level on subtraction, pairing the 2nd grade comparing measurement worksheets with a number line or hundred chart gives them a way to check their computation without removing the measurement task. At that stage, accurate measurement and understanding what the comparison question is asking are the priorities — arithmetic support keeps the focus on measurement reasoning, where it belongs.
Frequently Asked Questions
How do I explain "difference" to a student who keeps writing the longer measurement as the answer?
Place the two objects side by side with their left edges aligned. The section of the longer object that extends past the shorter one is the difference — physically. Have the student mark that section with a sticky note or cut a strip of paper that matches it exactly. Holding that strip and being told "this is four centimeters" makes the connection between subtraction and physical space concrete in a way that a written equation alone rarely achieves. Students who write the longer measurement as their answer have usually not separated "the longer object" from "how much longer it is" — that visual gap needs to be made explicit before worksheet practice can reinforce the correct interpretation.
My students keep starting their measurement at the 1 instead of the 0. What actually fixes it?
The most reliable fix is a physical ritual: before touching the object to the ruler, students point to the zero — every time, as a non-negotiable step. Some teachers mark the zero end of every classroom ruler with a red dot at the start of a measurement unit. Starting with printed-scale worksheets before physical ruler work also helps, because students can circle the zero on the page before recording the measurement, and the habit forms before a physical tool is introduced. Once a student has measured from the 1 for several weeks, the misread becomes automatic and takes significantly longer to correct than if it is caught early.
Should I introduce inches or centimeters first?
One system at a time is less confusing for most second graders, and starting with inches is practical because most classroom rulers show inches on the top edge — students naturally look there first. Centimeters carry an additional layer of difficulty: the unit is smaller, so the marks are closer together and the numbers climb faster for a shorter physical distance, which surprises students who expect a longer object to always produce a bigger number. Introducing centimeters after students are solid with inches lets you name the difference explicitly: same object, different unit, bigger number. That explanation lands more cleanly when students have already worked with one system and have something concrete to compare against.