These 2nd grade measuring length worksheets printable resources cover the full 2.MD.A cluster — reading a ruler at zero, selecting the right measuring tool, recording measurements in two units, estimating before measuring, and comparing lengths through subtraction. Each worksheet isolates one skill, letting a teacher match the practice directly to the day's objective without asking students to context-switch mid-session. The set follows the sequence that works best with seven- and eight-year-olds: sustained time at the ruler-reading stage before moving into estimation and comparison tasks.
Skills These Worksheets Build
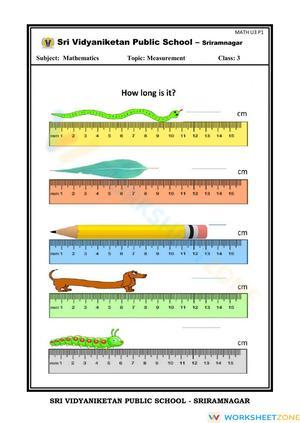
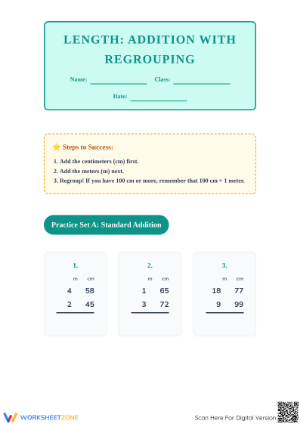
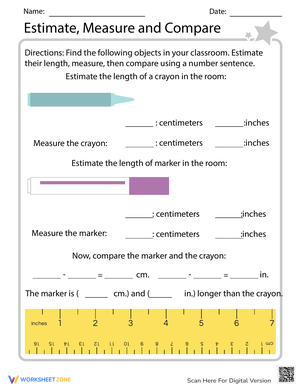
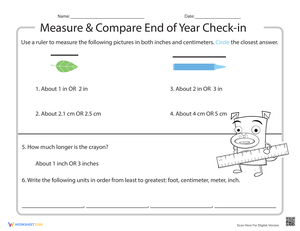
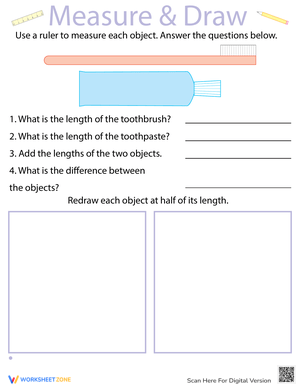
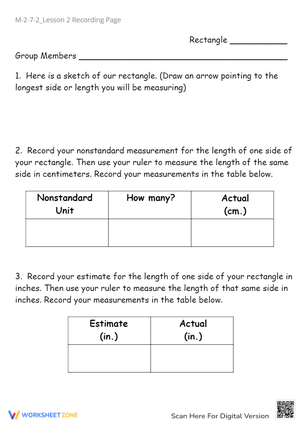
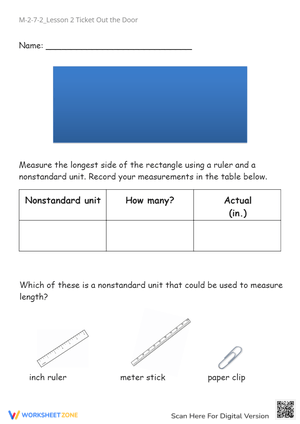
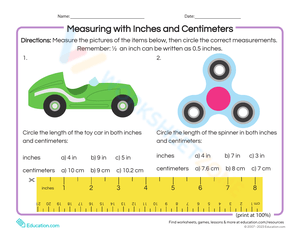
The set moves through four distinct skill layers, each corresponding to a standard in the 2.MD.A cluster. Students begin by matching measurement tools to objects — ruler for a crayon, yardstick for a bookshelf, meter stick for longer distances — and explaining why one tool is more practical than another. From there, worksheets address ruler alignment and whole-number measurement. The next layer introduces dual-unit recording: students measure the same object in both inches and centimeters on a single worksheet, then respond to a prompt about why the centimeter count is larger. Estimation worksheets follow, requiring a written prediction before students reach for a tool. The final layer targets comparison: students measure two objects and subtract to find the exact difference.
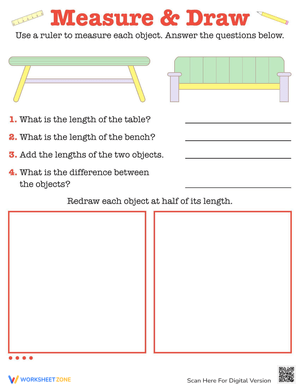
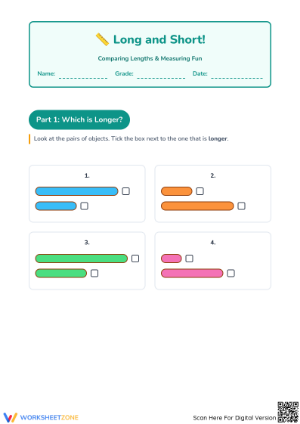
Each worksheet in the comparison layer includes a visual model — two horizontal bars drawn to scale — positioned above the answer lines. That visual step matters at this age because students who can picture the gap between two lengths before writing a subtraction equation make far fewer arithmetic errors than those working only from numerals.
Student Errors Worth Watching For in This Unit
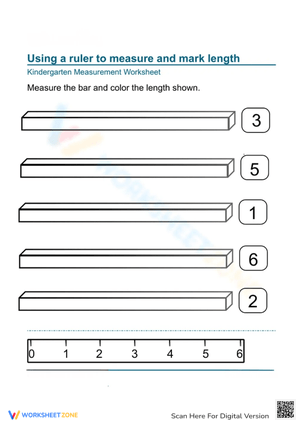
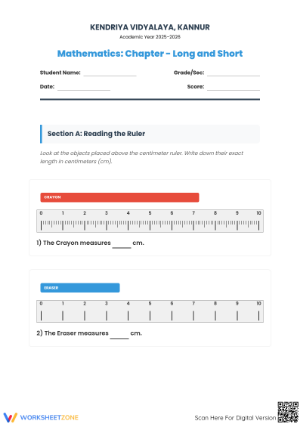
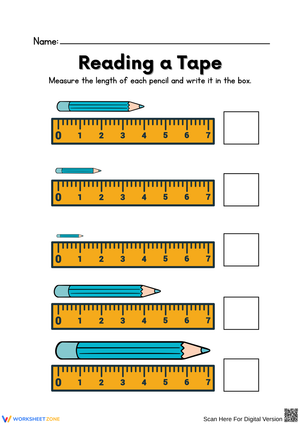
The most predictable error in second-grade measurement is starting the ruler at 1 instead of 0. Students know that counting begins at one, so zero feels like a placeholder rather than a starting line. When reviewing completed 2nd grade measuring length worksheets printable activities, scan the first few entries on any ruler-reading exercise — a student whose answers are consistently one unit too short has this alignment problem, not a numeral-reading problem. The most effective fix is tactile: have the student press a finger on the zero mark, slide the object up until it touches the finger, then lift the finger before recording.
The second common misconception involves the inverse relationship between unit size and count. Students who measure a pencil in centimeters and then in inches expect the larger unit to produce the larger number. When they see fewer inches than centimeters, many conclude they measured wrong. A brief conversation — "which is bigger, one centimeter or one inch? So which unit needs more of itself to cover the same distance?" — usually resolves this faster than any corrective practice would.
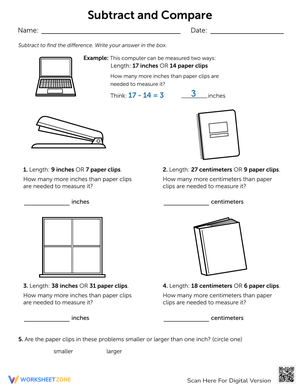
A third error surfaces specifically in comparison problems: students measure both objects accurately but then subtract without confirming the units match. A student might record five inches and twelve centimeters for two objects and subtract to get seven — a meaningless result. Every answer line in the comparison worksheets is labeled with the unit, which prompts students to catch this mismatch before moving on.
How to Build These Worksheets Into Your Measurement Unit
The most effective placement for ruler-reading practice is immediately after direct instruction — not the following day. Second graders benefit from practicing physical ruler alignment while the teacher's model is still fresh. A five-minute independent task with one of these worksheets, followed by a quick whole-class check, tells you by the end of the first lesson which students have the zero-mark problem and which are ready to move forward.
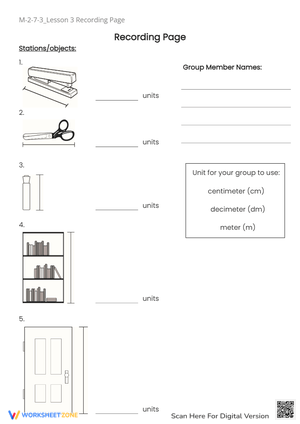
Math centers are where 2nd grade measuring length worksheets printable activities do their steadiest work over the course of a unit. Set up one center with a stack of worksheets and a bin of real objects that match what's pictured on the page — a crayon, a marker, a short piece of ribbon, a pencil. Students measure the actual object, then compare their answer to what they recorded on the worksheet. The mismatch, when it happens, generates more productive thinking than any teacher correction would.
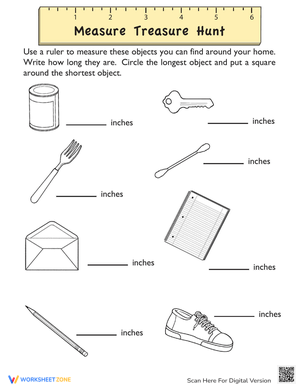
One strategy worth trying: give students a worksheet that lists target measurements — four inches, nine centimeters, two feet — and challenge them to find classroom objects that match those lengths exactly. This reverses the usual task. Instead of measuring a named object, students apply estimation and tool use simultaneously to hunt for a match. The worksheet becomes a record sheet rather than a set of prompts to work through, and the room itself becomes the measurement context.
Standard Alignment
These worksheets address all four standards in the 2.MD.A cluster:
- 2.MD.A.1 — Measure the length of an object by selecting and using appropriate tools such as rulers, yardsticks, meter sticks, and measuring tapes. Tool-selection worksheets address this standard directly, asking students to identify the right instrument before measuring.
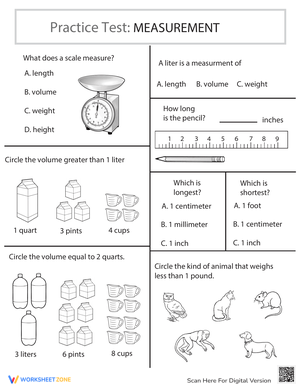
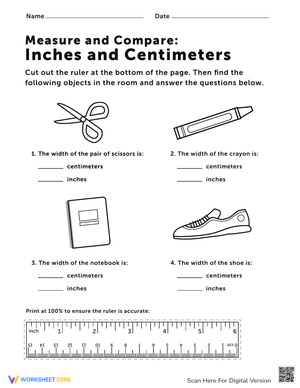
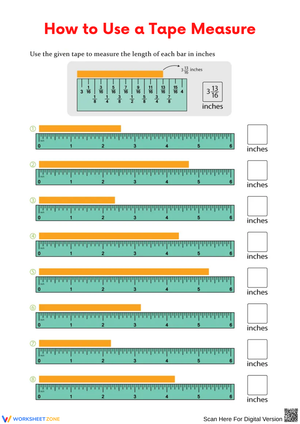
- 2.MD.A.2 — Measure the length of an object twice using units of different sizes, and describe how the two measurements relate to the size of the unit chosen. Dual-unit worksheets place both measurements side by side and include a written-response prompt about the inverse relationship.
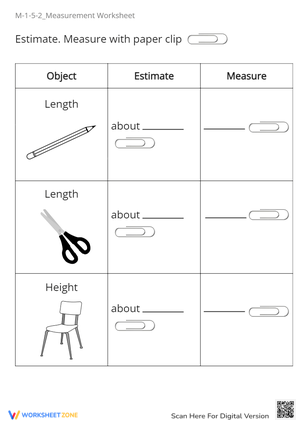
- 2.MD.A.3 — Estimate lengths using units of inches, feet, centimeters, and meters. Estimation worksheets require a written prediction before any measuring tool is used, building the mental benchmarks the standard calls for.
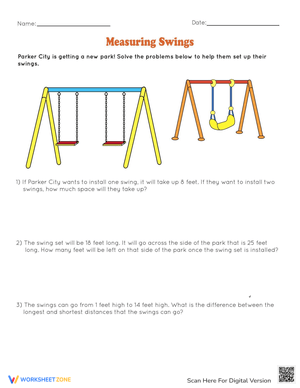
- 2.MD.A.4 — Measure to determine how much longer one object is than another. Comparison worksheets integrate subtraction into a measurement context — the instructional intent behind this standard.
In most second-grade pacing guides, the 2.MD.A cluster arrives after students have reviewed subtraction within 100. The comparison worksheets assume that arithmetic fluency and ask students to apply it rather than re-teach it.
Adjusting the Set for Different Student Levels
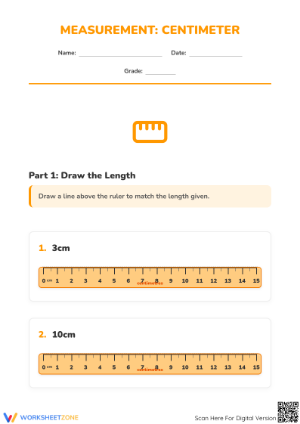
Students still uncertain with whole-number ruler reading need a narrower focus: ruler-alignment worksheets only, with whole-centimeter measurements where there is no chance of landing between marks. Including a printed paper ruler on the worksheet removes the variable of students using different rulers and keeps the practice consistent across the class.
Students who have the basics down can move into estimation tasks with a deliberate pause built in — they estimate, set down the ruler, write the prediction, then pick it back up to measure. That gap forces genuine estimation rather than quick visual scanning of the ruler before writing a number.
For students working above grade level, the comparison worksheets extend naturally by introducing measurements to the nearest half-inch. The worksheet format stays the same; only the ruler changes. Students who finish early can attempt the classroom measurement hunt described above as a free-choice extension, which adds a problem-solving layer without requiring a separate assignment to prepare.
Frequently Asked Questions
How do I correct students who keep starting at 1 instead of 0?
Address it physically before addressing it verbally. Have the student touch the zero mark, hold that spot, then slide the object up until it contacts their finger. Once the starting point is felt rather than just seen, the concept lands faster. On printed ruler images, adding a small bold triangle or arrow at the zero end signals where measurement begins and reduces the error noticeably in subsequent practice.
Should I introduce customary and metric units at the same time?
Separate introduction works better in practice. Give students enough time with inches and feet to estimate a short object with reasonable accuracy before bringing in centimeters. Once both systems are introduced, 2nd grade measuring length worksheets printable dual-unit activities give students a structured way to see the connection — measuring the same object twice and comparing the numbers — rather than asking them to absorb two measurement systems in parallel without a linking context.
What if students don't have a ruler at home to complete these worksheets?
Send a printed paper ruler home alongside the worksheet. Printed rulers introduce a minor caveat around printer scaling, but at 100% scale they work reliably for whole-unit practice. Include a short note confirming the ruler was printed to scale — it saves a surprising number of confused parent emails and ensures the student's answers make sense against the answer key.
How do I use these worksheets to check understanding rather than just assign practice?
Look at the first two entries on any ruler-reading worksheet. If both are off by exactly one unit, the student is starting at 1. If the errors are inconsistent — sometimes correct, sometimes off by two or three — the student is guessing rather than reading carefully. Either pattern points to a clear next step. As exit tasks, three or four measurement problems take about six minutes and tell you whether the class is ready to move into estimation work the following day.