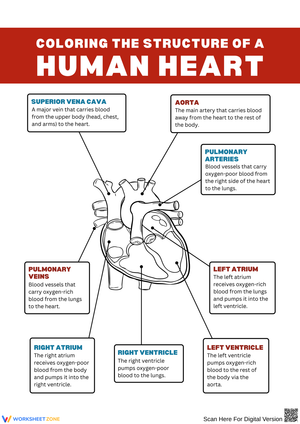
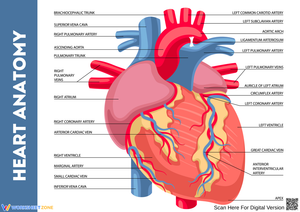
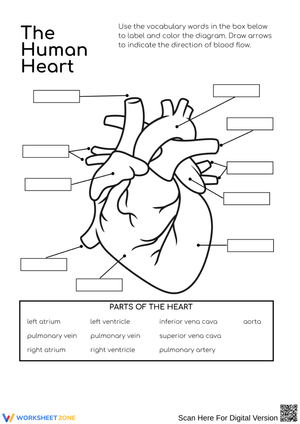
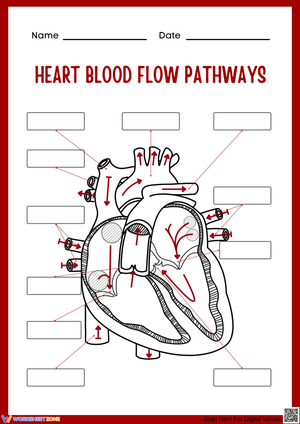
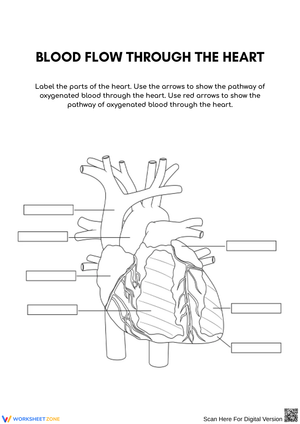
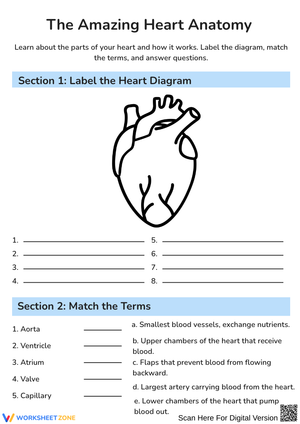
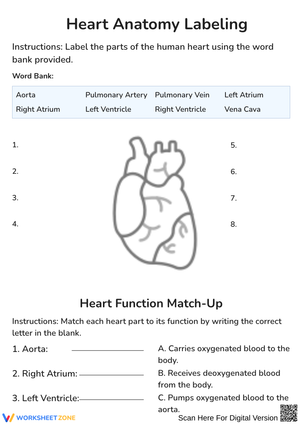
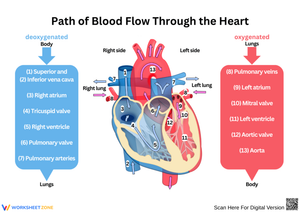
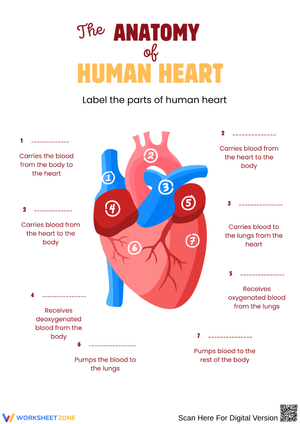
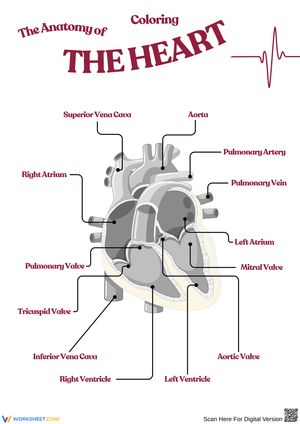
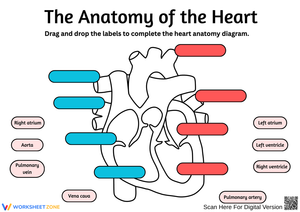
These 6th grade heart anatomy worksheets give science teachers a focused tool for building circulatory system vocabulary and structure-function understanding without sliding into high school physiology. Each worksheet targets the four-chamber model—right atrium, right ventricle, left atrium, left ventricle—alongside the major vessels and valves that Grade 6 students are typically expected to name and trace. The set includes labeling diagrams, blood-flow sequencing tasks, vocabulary matching, and short written-response prompts that serve as exit checks or formative data.
What Students Practice in Each Worksheet
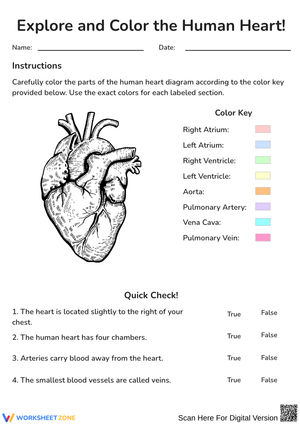
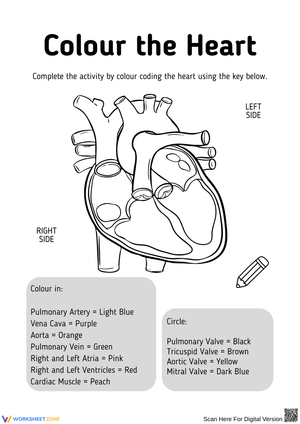
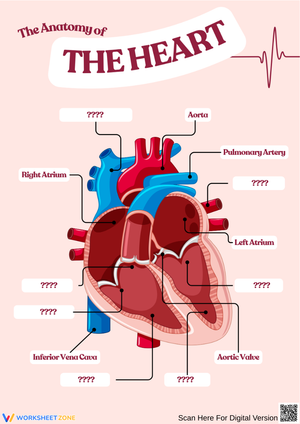
The labeling worksheets ask students to identify and write the names of the heart's four chambers, the septum, the major valves, the aorta, the superior and inferior vena cavae, and the pulmonary arteries and veins. The full structure list runs to twelve or more named parts, so each worksheet keeps the diagram clean and the label lines uncluttered rather than cramming everything into a single busy figure. At Grade 6, students need repeated exposure to these terms before the vocabulary holds, which is why the set returns to key structures across more than one worksheet format.
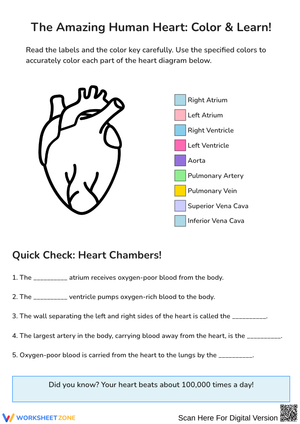
Beyond labeling, students practice tracing blood flow in sequence. The expected circuit at this level runs from the body to the right atrium, through the right ventricle to the lungs, back to the left atrium, through the left ventricle, and out through the aorta to the body again. Sequencing tasks ask students to number the steps or fill blanks in that pathway, reinforcing the logic of the circuit rather than just the names of the stops. Students who can complete that sequence without a word bank have moved past surface memorization into something more durable.
Common Student Mistakes Teachers Should Anticipate and Address
The most predictable error on a heart labeling worksheet is the left-right flip. Heart anatomy diagrams are shown from the front of the body, which means the heart's right side appears on the left side of the diagram. Students new to anatomical illustrations read the diagram the way they'd read a photograph of themselves—so they label the viewer's left chamber as "right atrium" when it's actually the left atrium. This error compounds every blood-flow tracing task that follows, making it worth catching during the first labeling activity rather than discovering it on an assessment.
A second pattern surfaces consistently: students learn "arteries carry blood away from the heart, veins carry blood to the heart" as a clean rule—then they encounter the pulmonary vessels, which appear to break it. The pulmonary artery carries oxygen-poor blood away from the right ventricle, and the pulmonary veins return oxygen-rich blood to the left atrium. Students who have memorized only the directional version of the rule mark these vessels incorrectly because the oxygen content contradicts what they expect. A brief discussion before the diagram activity—framing the rule as being about direction, not oxygen level—prevents most of these errors before they're written in.
Students also tend to collapse the pulmonary circuit and the systemic circuit into one undifferentiated loop. On sequencing worksheets, they write something like "heart → body → lungs → heart," which skips the right-side/left-side division entirely. Teaching blood flow as two separate trips—one loop between the heart and lungs, a distinct loop between the heart and the rest of the body—gives students a model sturdy enough to hold up under the worksheet questions and during class discussion.
How to Build These Worksheets Into Your Lesson Plans
A single 50-minute period holds three short tasks well when the worksheets are sequenced with purpose. Open with a brief teacher-led walkthrough of a blank diagram on the projector—five to eight minutes covers chamber names and one pass through the blood-flow pathway. Students then complete a labeling worksheet independently, which gives the teacher six to eight minutes to circulate and catch the left-right flip error before it gets reinforced in writing. A blood-flow sequencing worksheet closes the period and produces formative data for the next day's planning without adding any extra materials to set up.
For station work, three different worksheets at three tables work well: labeling at one, vocabulary matching at a second, and a short reading with comprehension questions at the third. Rotate groups every twelve to fifteen minutes. The reading station benefits from a paired format—two students sharing the task handle unfamiliar science terminology more readily than one student alone, and the teacher hears more genuine content talk at that table than at any other station.
For substitute plans, a labeling worksheet, a sequencing task, and an answer key give a sub enough structure to run the period without lab equipment or a projector. Students who finish early can write the full blood-flow pathway from memory on the back of the sequencing worksheet—a retrieval exercise that costs nothing to set up and surfaces exactly what each student has retained.
Standard Alignment
These worksheets align with NGSS MS-LS1-3, which asks students to construct arguments supported by evidence explaining how body systems interact to carry out life functions. In Grade 6 classrooms, the circulatory system is a central context for that standard—students use heart structure and blood-flow evidence to explain how oxygen and nutrients reach cells. The labeling and sequencing tasks give students the structural knowledge they need before they can support those explanations in writing or discussion. Most state science frameworks that follow NGSS place circulatory system content in Grade 6 or 7, so 6th grade heart anatomy worksheets resources fit naturally into the first or second body-systems unit of middle school science.
Differentiating These Worksheets Across Ability Levels
For students who are still building English academic vocabulary or who struggle with visually dense diagrams, start with a worksheet that shows only the four chambers labeled and asks students to fill in two or three blanks rather than the full structure set. Color support—shading oxygen-poor blood blue and oxygen-rich blood red—turns an abstract sequence into something spatial and visible. Sentence frames such as The right ventricle pumps blood to ______ or The aorta carries blood from the ______ to the body help students produce complete science sentences without stalling at the blank line.
For students who are ready to go further, remove the word bank from any labeling worksheet and ask them to annotate each structure with its function in a second color. An extension prompt worth keeping available: ask why the left ventricle has a noticeably thicker muscular wall than the right ventricle. That question asks students to connect structural difference to functional demand—pumping blood to the entire body requires more pressure than pumping it to the nearby lungs—and it reveals whether students genuinely understand the anatomy or have only memorized the labels.
When a class spans a wide reading range, breaking each worksheet into two shorter segments works better than combining everything into one longer task. A half-sheet labeling activity followed by a separate sequencing task keeps cognitive load manageable and makes it easier to pinpoint exactly which part of the content a student hasn't yet secured.
Frequently Asked Questions
Which heart structures are 6th graders typically expected to label?
Most middle school science curricula include the four chambers, the septum, the major valves, the aorta, the superior and inferior vena cavae, and the pulmonary arteries and veins. Some districts add the coronary arteries or chordae tendineae depending on the textbook and the depth of the unit, but the core structure list above covers what appears on most Grade 6 assessments.
How long does each worksheet take to complete?
Each worksheet runs between ten and twenty minutes depending on student pacing. The labeling worksheet takes longest the first time students encounter the diagram; the vocabulary matching worksheet moves faster once students have seen the terms in context. That range makes any worksheet in the set easy to slot as a warm-up, station activity, or closing task within a standard class period.
Do the worksheets include answer keys?
Yes. Each worksheet includes a completed answer key. The blood-flow sequencing key also includes brief explanations for why each step follows the previous one, which gives teachers a ready reference when addressing the directional errors students make on that particular task.
Are these worksheets appropriate for 7th grade or as review for 8th grade?
The content level targets Grade 6 as the primary placement, but the worksheets work well as review in Grade 7 before extending into respiration or other body systems. For 8th grade, they function best as a quick diagnostic at the start of a health or introductory biology unit. Teachers using these 6th grade heart anatomy worksheets in other grades typically place them early in a lesson rather than as the main new-content activity.
Can these worksheets be assigned as homework?
The labeling and matching worksheets travel well as homework because the directions are self-contained and no additional materials are needed. Students who complete the sequencing worksheet independently without a word bank have secured the content at the level most Grade 6 assessments require. Teachers looking for 6th grade heart anatomy worksheets to use as a pre-unit diagnostic can assign the vocabulary matching worksheet on day one to see what prior knowledge students carry in from elementary school—and to identify the students who will need the most support with the left-right orientation problem before the labeling activities begin.












 Interactive Worksheet Maker
 Quiz Maker
 Word Search Maker
 Crossword Puzzle Maker
 Word Scramble Generator
 Sentence Scramble Generator
 Handwriting Worksheet Generator
 Name Tracing Generator
 Fill In The Blank Generator




 BACK TOSCHOOL