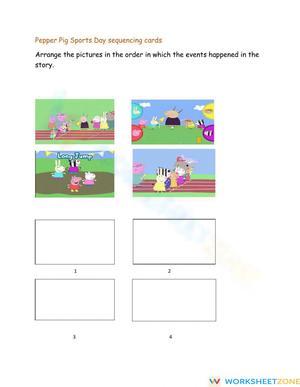
These kindergarten picture sequencing worksheets give early learners a concrete way to work with story structure before they can read a single sentence. Each worksheet presents illustrated events out of order; students cut, arrange, and paste them into the correct sequence — building the foundational comprehension skills that carry forward into independent reading. The set moves from three-step sequences built around familiar routines to four-step sequences that require students to track cause and effect across a slightly longer narrative arc.
What's Inside the Set
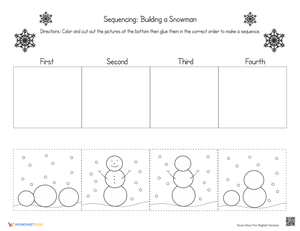
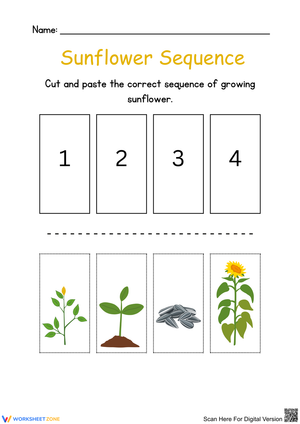
Each worksheet centers on a single, self-contained sequence — a familiar process or simple story stripped down so students can focus entirely on order rather than on decoding unfamiliar content. Themes draw on routines children already know: planting a seed, washing hands before lunch, building a snowman, making a simple snack. That prior knowledge matters — when a kindergartner already understands that soil comes before the seed and water comes after, cognitive load drops and the sequencing concept itself moves to the foreground.
The three-step worksheets appear first in the set and handle just beginning, middle, and end. The four-step worksheets introduce a transitional beat — the moment between an action and its outcome — which is where students start to internalize cause and effect as a narrative concept rather than just event order. Skills reinforced across the set include:
- Identifying chronological order in pictured events
- Recognizing the relationship between an action and its consequence
- Using ordinal language (first, next, then, last) to narrate a picture sequence aloud
- Retelling a simple narrative using visual prompts
- Matching transition vocabulary to specific positions in a sequence
Standard Alignment
These worksheets align directly with CCSS.ELA-LITERACY.RL.K.2, which requires kindergartners to retell familiar stories including key details, with prompting and support. Picture sequencing is the earliest practical application of that standard — it asks students to reconstruct narrative order from visual evidence rather than from memory of text. Teachers can use a completed worksheet as a formative artifact: if a student sequences four steps correctly and can narrate them aloud using at least two transition words, that's observable evidence of RL.K.2 progress. If the student sequences correctly but narrates in an unordered way ("and then... and the flower... and he put water"), there's a separate oral language target to address. The worksheet surfaces both at once.
The oral language component also connects to CCSS.ELA-LITERACY.SL.K.4, which asks students to describe familiar people, places, things, and events and provide additional detail. Narrating a picture sequence with temporal language is a direct application of that standard in a structured, low-stakes context.
Common Student Errors Worth Watching For
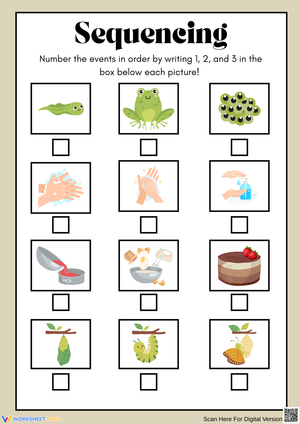
The beginning and end rarely cause trouble — students anchor on the most obvious starting and stopping points quickly. Where sequencing breaks down is the interior. On a four-step worksheet showing a caterpillar sequence, students who place the cocoon and butterfly in reversed order often do so because both images look like "later stages" to them; they haven't yet internalized that transformation is a process with its own internal sequence. A brief one-on-one conversation where a teacher acts out the steps — curling up, waiting, then stretching out — tends to click faster than re-explaining the picture.
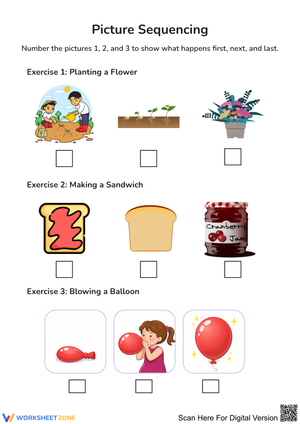
A second pattern that shows up in student work: children who correctly sequence three-step routines sometimes struggle when a fourth step is introduced mid-process rather than appended to the end. If the familiar three-step "plant a seed" sequence adds a fourth image showing the gardener labeling the pot after planting, students frequently treat that step as the first, not the third. They default to "that looks like something you'd do at the beginning." Pointing to that specific type of interior step during whole-group instruction, before independent practice, prevents a lot of confusion later.
How to Build These Worksheets Into Your Lesson Plans
The most effective entry point is whole-group modeling during morning meeting. Project the three images from a worksheet — mixed-up order, visible to everyone — and think aloud through your reasoning before inviting students to help re-order them. The goal isn't just to get the right answer; it's to make the thinking audible. "I know this one comes first because the bread is still separate — the sandwich isn't made yet." That narrated decision-making gives students a model they can replicate during independent practice.
After the whole-group introduction, the worksheets move naturally into a literacy center rotation. Pre-cut the pictures for students who are still building scissor control so the sequencing thinking doesn't get buried under a cutting task. Students who are ready can handle their own cutting — that fine-motor work is worth preserving when it doesn't obscure the lesson's purpose. A sorting mat with labeled sections (first, next, then, last) gives students a scaffold to arrange before committing to glue. The recording sheet extension — where students draw or label the steps after pasting — functions well in the 8–10 minutes at the end of a center rotation when fast finishers need a meaningful follow-on task.
For a kinesthetic reinforcement, give each student in a small group one picture card from the same sequence and have them physically line themselves up in order. The student holding the "washing hands" card has to decide where to stand relative to the student holding the "turning on the faucet" card. That physical negotiation produces exactly the verbal reasoning you want: "You have to come first because the water needs to be on before I can wash."
Adjusting the Worksheets for a Range of Learners
For students who need additional support, limit the initial task to two-card sequences — first and last only — so they can experience success with the anchoring logic before tackling the middle. Pairing a struggling student with a pre-arranged completed example during independent work reduces the open-ended nature of the task without removing the comprehension component: the student still narrates the sequence aloud, which is where the actual learning happens.
Students who move through the three- and four-step sequences quickly benefit from the oral extension: ask them to add a step that isn't shown. "What do you think happened before this first picture?" or "What might happen after the flower blooms?" This pushes beyond sequencing into inference and narrative prediction — skills that are developmentally appropriate for advanced kindergartners and that directly support first-grade comprehension work. ELL students often find these worksheets more accessible than text-heavy literacy tasks; the visual format removes the decoding barrier, and pairing the worksheet with four vocabulary cards — one word per step — gives them the language support to narrate without being overwhelmed by unfamiliar sentence structures.
Frequently Asked Questions
How many steps should I start with for students who have no prior sequencing experience?
Start with three steps built around the most familiar routines possible — brushing teeth, putting on shoes, making a sandwich. The goal in the first week is for students to internalize the concept of order itself, not to wrestle with unfamiliar content. Once students can narrate a three-step sequence using at least two transition words without prompting, they're ready for four steps.
Can I use these worksheets with students who aren't yet cutting independently?
Pre-cutting the picture cards removes the fine-motor barrier without changing the cognitive task. The sequencing and narrating work remains intact. If scissor practice is also a goal during the session, building in a separate cutting activity before the sequencing work keeps both skills from competing for attention at the same time.
How do I use a completed worksheet for assessment?
The pasted arrangement tells you whether the student identified the correct order, but the more informative assessment happens when you ask the student to narrate after pasting. A correct arrangement paired with disordered verbal retelling suggests the student used visual logic to sequence but hasn't connected that logic to oral narrative structure — a specific gap worth targeting. A rubric with three simple criteria (correct order, use of at least one transition word, and ability to explain one step's placement) gives you a fast, repeatable formative record without requiring a separate assessment instrument.
What's the best way to introduce transition words alongside these worksheets?
Introduce one or two transition words at a time, attached to a specific position in the sequence. "The word first belongs with the very beginning picture — before anything has happened yet." Anchor the vocabulary to a physical location on the sorting mat so students associate first with the leftmost card and last with the rightmost before adding next and then to the interior positions. Expanding the vocabulary set all at once tends to produce rote recitation rather than genuine understanding of what the words signal.