


Want to know how to create an interactive worksheet that will truly engage your students? Worksheetzone makes it easy to transform static PDFs into dynamic learning experiences! This interactive worksheet maker provides a simple platform for educators to create exciting digital materials that students can complete and submit online. Whether you’re a tech-savvy teacher or just starting with digital tools, this guide will equip you with the knowledge and skills to create an interactive worksheet step-by-step. Scroll down for more!
Getting Started with Worksheetzone
Worksheetzone provides a user-friendly interface and a wealth of tools to empower educators in creating interactive worksheets. Here’s how to embark on your interactive worksheet creation journey:
- Sign Up: Create a free account on Worksheetzone. The registration process is quick and straightforward, requiring only your email.
- Explore the Dashboard: Familiarize yourself with the intuitive dashboard layout. Here, you’ll find options to create new worksheets, access your saved worksheets, explore the ready-to-use materials, and manage your account settings.

Creating Interactive Worksheets: A Step-by-Step Guide
Worksheetzone offers two convenient ways for creating interactive worksheets, catering to different preferences and levels of comfort with technology. Our worksheet maker has been providing one of the most useful tool sets that let you transform almost all your printable worksheets into interactive formats.
1. Directly with Landing Digital Worksheet Maker
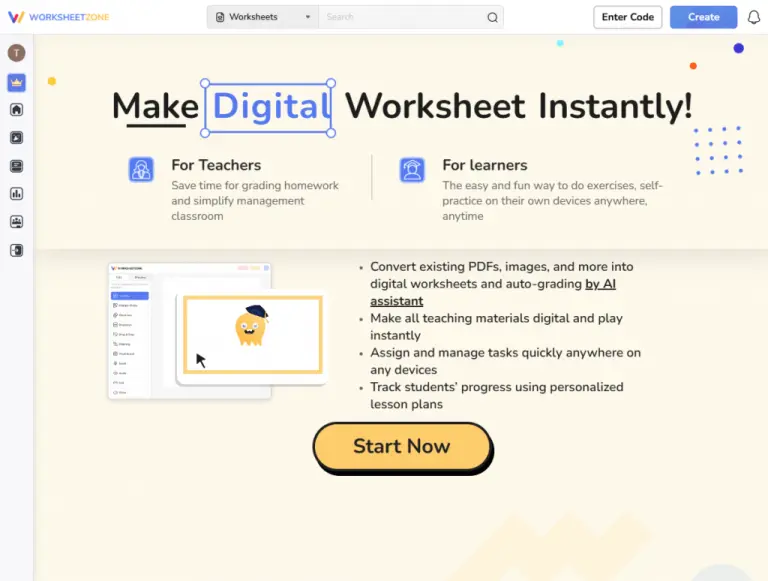
Step 1: Access the Worksheet Maker Tools
To begin creating your interactive worksheets, first head to the digital worksheet maker. Click on the “Start now” button on the landing page.
Step 2: Upload Your Worksheet
Click the “Browse File” button or drag and drop your file. Next, upload your existing worksheet in PDF or image format (PNG, JPG, JPEG). The maximum file size allowed is 5.5 MB. Wait for the upload to complete and the document to render.

Step 3. AI-Powered Detection
Worksheetzone’s intelligent AI assistant analyzes your uploaded document and automatically identifies areas that can be transformed into interactive elements. For example, it can detect multiple-choice questions, fill-in-the-blanks, and matching exercises. These elements appear as highlighted or marked areas on your worksheet.

2. Main Menu Navigation
This approach leverages the power of AI to streamline worksheet maker tools, especially when starting with existing materials. Follow these steps:
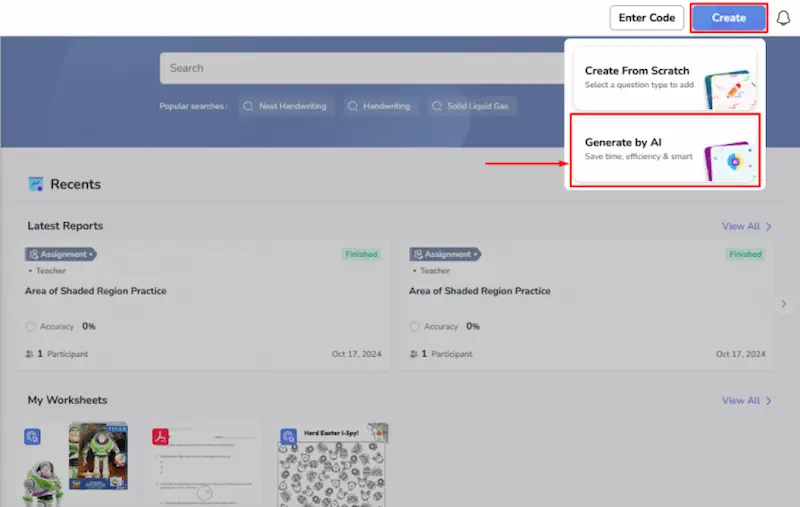
Step 1: Initial Set up
a. Click “Create” in the main menu and select “Generate by AI”
b. Choose Your Creation Method
Worksheetzone’s AI offers 3 distinct creation methods:
- Convert a Document: Transform existing documents, such as PDFs or Word files, into interactive worksheets. This is particularly useful for digitizing existing materials.

- Keyword: Generate worksheets based on a specific topic or keyword. This is ideal for quickly creating worksheets on common subjects.
- Paragraph: Create interactive quizzes in seconds from a longer text input.
Select “Convert a Document” to utilize this powerful feature.
Step 2: Upload Your File
Upload your file using one of the following methods:
- Drag & Drop: Simply drag your file from your computer onto the designated area.
- “Upload from device” button: Click this button to browse your files and select the document you wish to upload.
- “From Google Drive” option: For seamless integration, upload documents directly from your Google Drive.

File limitations: The maximum file size for uploaded documents is 5.5 MB. Supported formats include PNG, JPG, JPEG, DOC, and PDF.
Step 3: Transform Your Worksheet to Interactive
Click “Transform Non-Interactive to Interactive” and let the AI analyze your document and suggest interactive elements.

3. Add Interactive Components
The process of creating interactive elements is the same for both approaches. You’ll use the same tools and options to add interactive components to your worksheet.
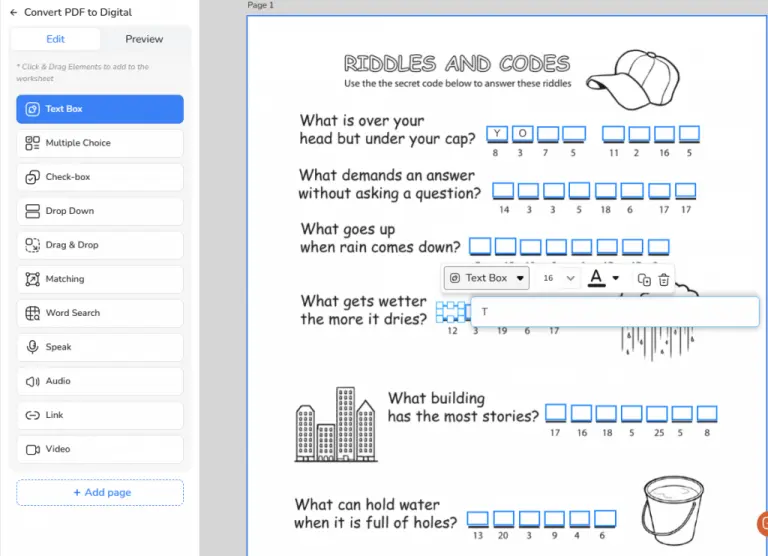
Using the intuitive left toolbar, click and hold to create interactive boxes anywhere on your worksheet. Worksheet Maker offers a diverse range of interactive tools that can add to your worksheet, each with its own unique function.
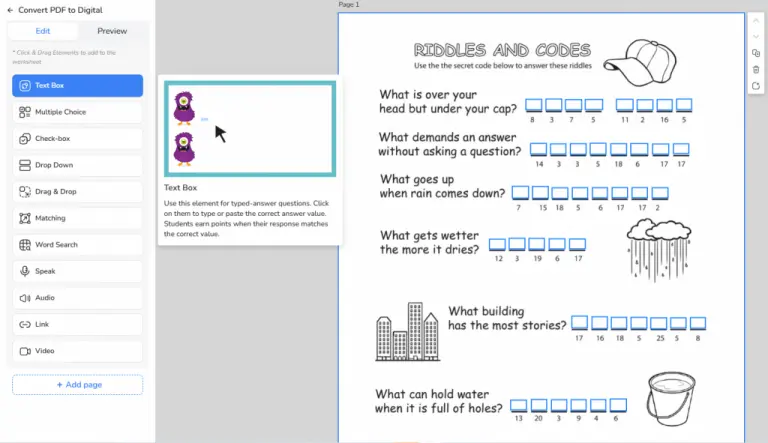
Check out the list of elements our interactive maker provides.
- Text Box: Enable students to type in their answers directly into the worksheet. This is ideal for short-answer questions, vocabulary exercises, or problem-solving tasks. You can set correct answers and provide automated feedback. For example, if a student inputs the correct answer, they can be shown a congratulatory message, while incorrect answers can prompt hints or corrections.
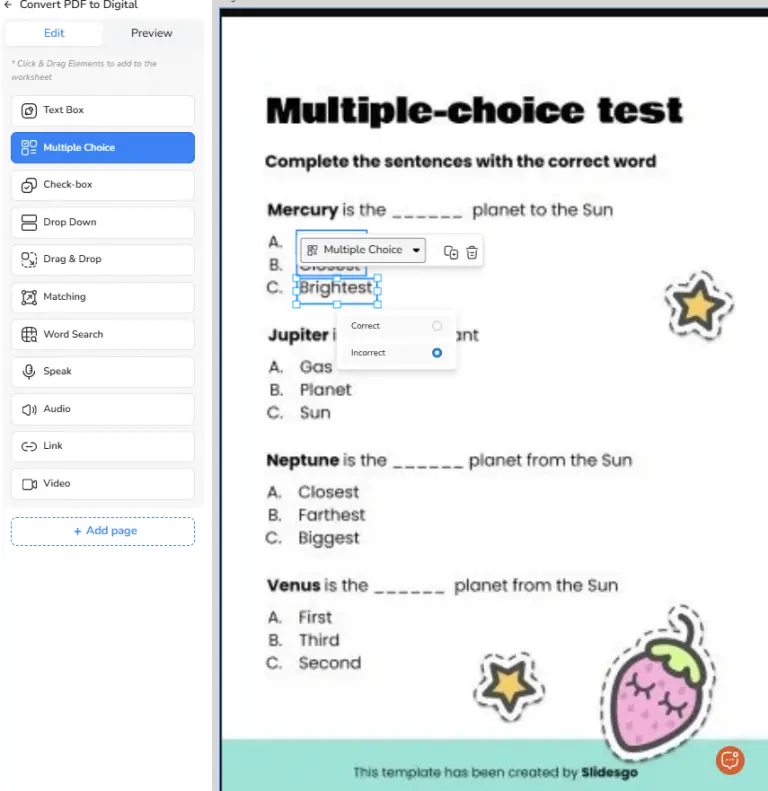
- Multiple Choice: Create single or multiple-select questions with customizable answer choices and feedback. This is one of the most popular ways to test comprehension and recall.
- Check-box: Ideal for true/false questions or scenarios where students can select multiple correct answers.

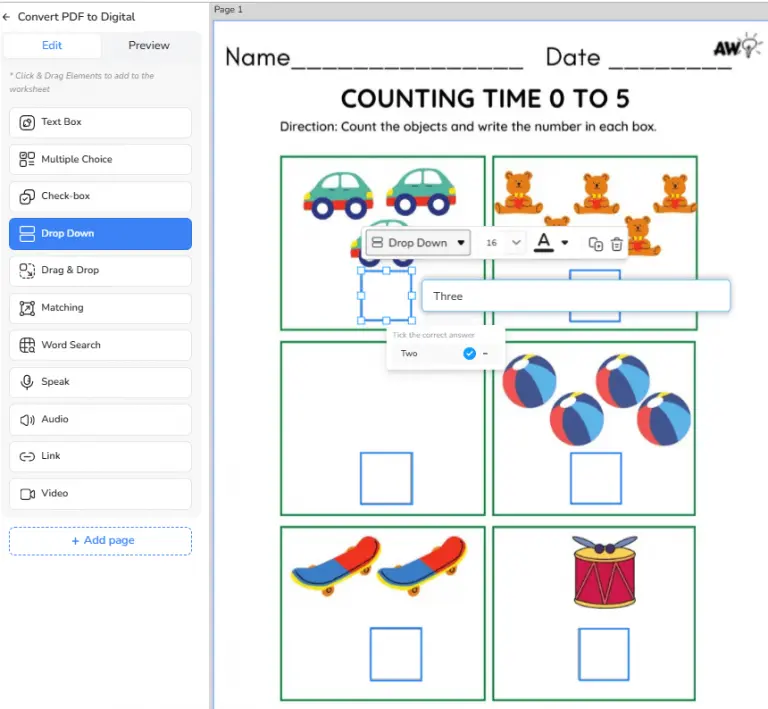
- Drop down: Offer a predefined set of answer choices for students to select from.
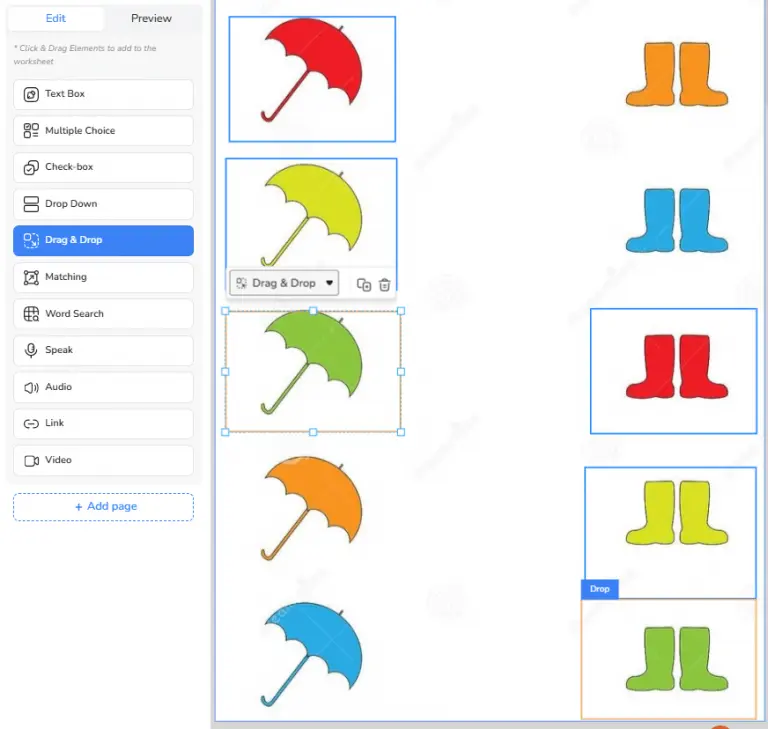
- Drag and Drop: Use this element when you want to create engaging matching or sorting activities where students drag and drop elements into designated areas. Simply draw the textbox, choose the “Drag & Drop” elements and two boxes will appear. Put them in the correct position and all will be set.
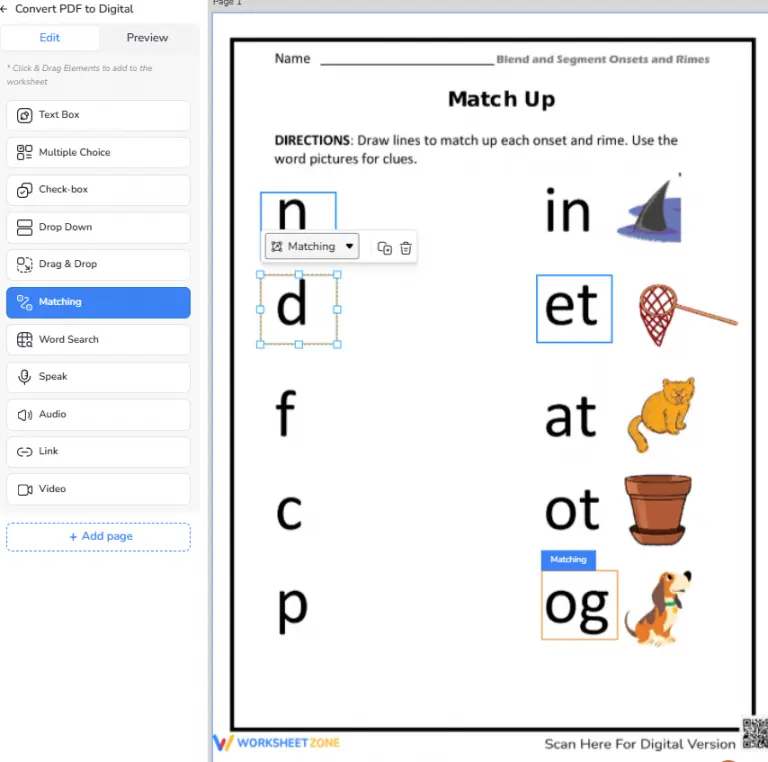
- Matching: Use this element for matching exercises. This element has the same mechanism as “Drag & Drop” elements. When students match the element correctly, they’ll graded accordingly.
- Word Search: Generate interactive word search grid to reinforce vocabulary or key concepts. Set the number of rows and columns, then click on the cells representing correct answers.

- Speaking: Allow students to answer by speaking. You need to type in the script for the correct answers and then choose the language of the script. Our AI can record and grade the answers spoken by your students.

- Audio: Incorporate audio recordings for listening comprehension exercises. You can either write the audio script or import a mp3 file here.

- Multimedia Elements: Embed videos, audio clips, and external links to enrich your worksheets and cater to different learning styles.
4. Save and Share Worksheet
Once you’ve created your interactive masterpiece, it’s time to save or share it with your students and manage their access.
To save the worksheet, click the red button “Save” at the top right of the screen. Enter all the necessary details to facilitate the categorization of the worksheet, including: Title, description, language, grade level and relevant tags.

Worksheetzone offers flexible options for sharing and managing your worksheets:
- Sharing Options: Choose your preferred sharing method:
Private: Save your worksheet privately for your own use. This is ideal for worksheets that are tailored to specific students or classrooms.
Public: Share your worksheet with the Worksheetzone community. This allows other educators to discover, use, and adapt your worksheets for their own classrooms.
- Assign to Students: If you’re using Worksheetzone with your students, you can assign worksheets directly to specific student groups or individuals. This streamlines the distribution process and allows you to track student progress.
Best Practices for Creating Interactive Worksheets
Creating interactive worksheets is more than just adding interactive elements; it’s about designing engaging and effective learning experiences. Here are some tips to keep in mind:
1. Keep it Clear and Concise
A well-organized worksheet is the foundation of an engaging learning experience. When students open a worksheet, they should immediately feel confident about where to start and how to proceed.
- Simplify the Layout: Keep your worksheet clean and organized layout. Use clear headings, ample spacing, and consistent formatting throughout. Group related items together to avoid confusion.
- Clear Instructions: Provide simple, direct instructions for each activity. Ambiguity can lead to frustration, so ensure students know exactly what to do in each section.
- Consistency: Use the same font, color scheme, and design elements across the entire worksheet. This helps create a cohesive and professional-looking document, making it easier for students to focus on the content rather than figuring out how to navigate the page.
Tip: Use bullet points or numbered lists to break down tasks or instructions, ensuring clarity and structure.
2. Incorporate Varied Activities
Incorporate a variety of interactive elements to cater to different learning styles and maintain student interest. Don’t stick to just one type of interactive element – mix it up!
- Diversify Question Types: Use a combination of multiple-choice questions, short-answer fields, drag-and-drop exercises, and matching activities. This will engage students and cater to different ways of processing information.
- Interactive Games and Activities: Incorporate activities like word searches, puzzles, or sorting tasks that give students a break from traditional question-and-answer formats while still reinforcing learning objectives.
- Balance Challenge and Accessibility: Provide a range of questions that vary in difficulty. Offer easier questions at the beginning to build confidence, then gradually introduce more challenging tasks to stretch students’ thinking and skills.
Tip: Use clear progression in the difficulty level of your questions, so students don’t feel overwhelmed at the start but are still challenged by the end.
3. Practice and Assessment
Effective worksheets should blend both practice and assessment to reinforce learning. Allow students to practice concepts through interactive exercises and then assess their understanding through quizzes or other assessment activities. Mix question types in your assessment – consider multiple-choice questions for quick checks of understanding, alongside open-ended questions that encourage deeper thought.
Tip: Include a balance of self-paced practice and short quizzes. This allows students to check their own understanding before you assess them formally.
Frequently Asked Questions
1. How to turn a PDF into an interactive worksheet?
Worksheetzone makes it a breeze! Simply upload your PDF, and our AI-powered assistant will automatically identify areas you can transform into interactive elements. You can add multiple-choice questions, drag-and-drop activities, and more with just a few clicks.
2. Can I create interactive worksheets for free on Worksheetzone?
Yes, you can create free interactive worksheets on Worksheetzone by using their free account, which gives you access to a wide range of templates and interactive tools.
3. How do students access the interactive worksheets?
Sharing your interactive worksheets is super easy! You can share a direct link with your students or create classroom assignments within Worksheetzone.org for seamless access and progress tracking.
4. Are there templates available for creating worksheets?
Absolutely! Worksheetzone offers a variety of ready-made templates for different subjects and grade levels. These templates provide a great starting point and save you valuable time.
Bottom Line
Learning how to create interactive worksheets on Worksheetzone opens up a world of possibilities for educators. By transforming traditional worksheets into engaging digital experiences, you can motivate students, enhance their understanding, and provide instant feedback. With its user-friendly interface and diverse interactive elements, Worksheetzone empowers you to create effective learning materials that bring your lessons to life. Let’s get started!