


























Views
Downloads
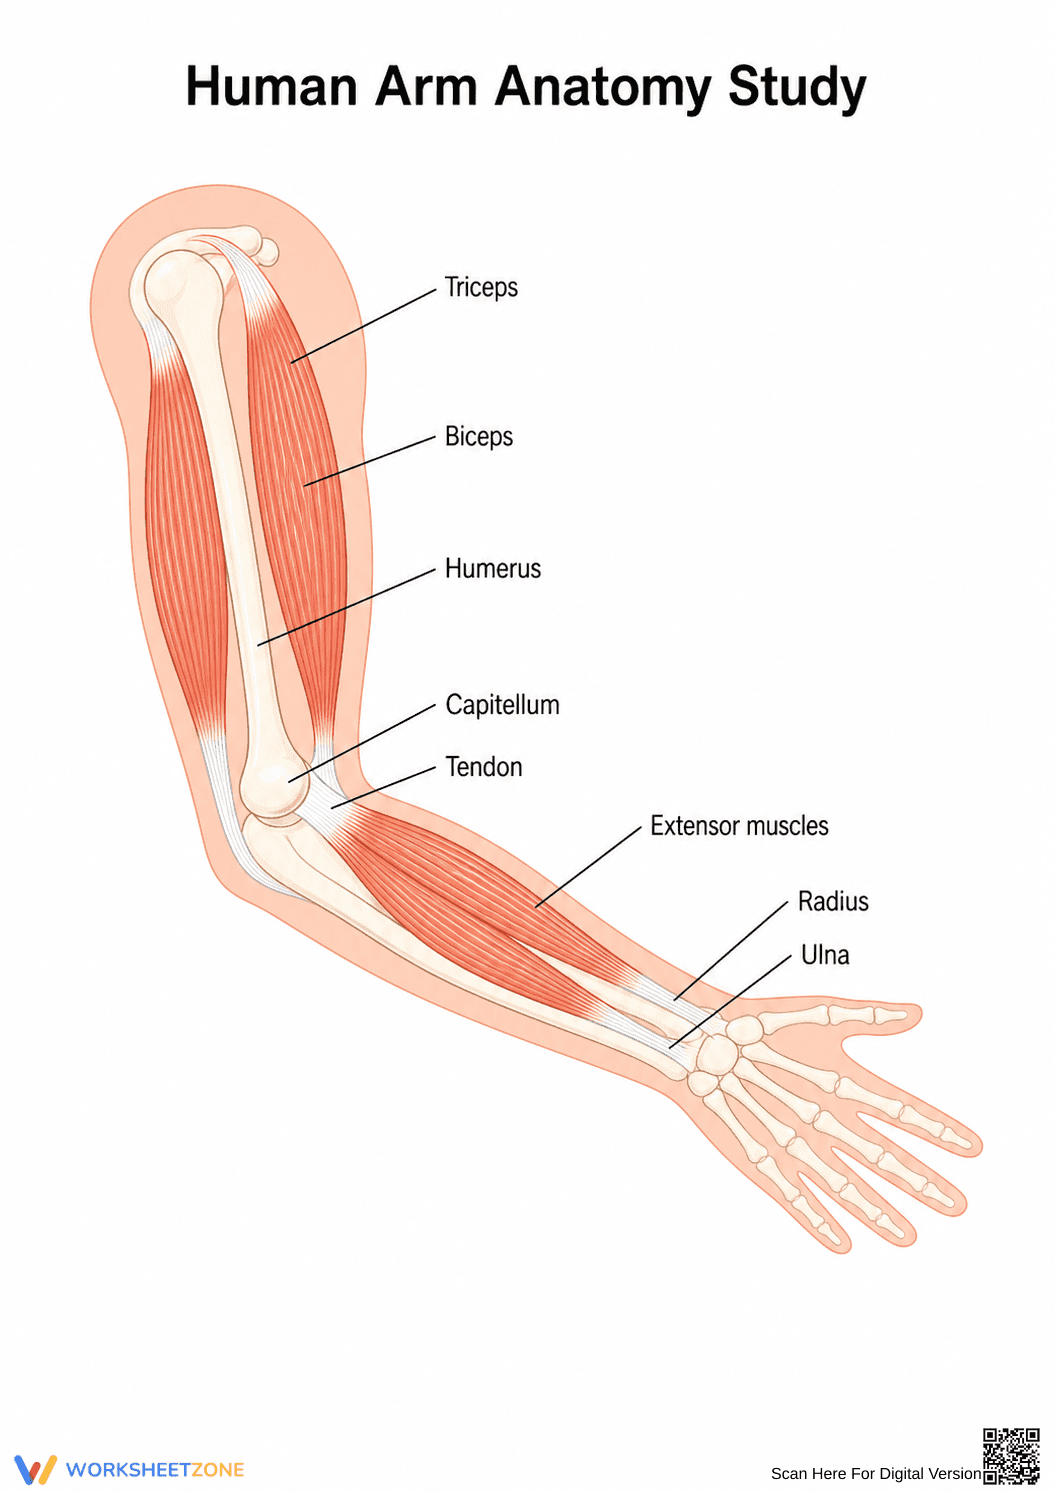

Grade 7 Human Arm Anatomy — Printable No-Prep Worksheet
Paste this activity's link or code into your existing LMS (Google Classroom, Canvas, Teams, Schoology, Moodle, etc.).
Students can open and work on the activity right away, with no student login required.
You'll still be able to track student progress and results from your teacher account.
This human arm anatomy reference guide helps students visualize the interacting subsystems of the muscular and skeletal systems. By studying this detailed diagram, learners will identify key bones and muscles, building a foundational understanding of how these structures work together to facilitate movement and support the body.
At a Glance
- Grade: 7 · Subject: Science
- Standard:
MS-LS1-3— Understand how body subsystems interact- Skill Focus: Identifying anatomical structures
- Format: 1 page · 1 detailed diagram · No answer key needed · PDF
- Best For: Visual reference and study guide
- Time: 10–15 minutes
This single-page resource features a high-quality, fully labeled illustration of the human arm. It clearly identifies major skeletal components, including the humerus, radius, ulna, and capitellum, alongside critical muscular structures like the biceps, triceps, extensor muscles, and connecting tendons. The clear visual layout makes it an ideal anchor chart or binder insert for life science units.
- Print (1 minute): Simply print the PDF as a handout or project it directly onto your smartboard for whole-class instruction.
- Distribute (1 minute): Pass out the diagram to students as they begin their unit on human body systems.
- Review (5 minutes): Walk through each labeled structure, discussing how the muscles pull on the bones to create movement.
Total teacher prep time is under two minutes, making this a perfect addition to a biology sub plan or an immediate visual aid for a lecture.
Aligned to primary standard MS-LS1-3: Use argument supported by evidence for how the body is a system of interacting subsystems composed of groups of cells. This visual guide supports the understanding of macroscopic subsystems (muscular and skeletal). Both standard codes can be copied directly into lesson plans, IEP goals, or district curriculum mapping tools.
Introduce this diagram before direct instruction on the musculoskeletal system to give students a visual framework. Alternatively, use it during a dissection lab as a comparative reference guide. As a formative assessment observation tip, ask students to cover the labels with sticky notes and attempt to name each part from memory, checking their own work afterward. Expected completion time for a review activity is 10 to 15 minutes.
This resource is designed for middle school life science and high school biology students. It serves as an excellent scaffold for visual learners or students needing clear, explicit vocabulary support. Pair this diagram with a blank version of the arm or a direct instruction lesson on biomechanics to reinforce the relationship between structure and function.
Integrating accurate visual models is critical for developing scientific literacy in anatomy and physiology. This resource aligns with MS-LS1-3, helping students understand how body subsystems interact by explicitly mapping the relationship between bones and muscles in the human arm. According to ScienceDirect TpT Analysis, providing students with clear, pre-labeled anatomical diagrams significantly reduces cognitive load during the initial stages of learning complex biological systems. When learners do not have to simultaneously decode text and guess spatial relationships, their working memory is freed to focus on functional connections, such as how the triceps and biceps operate as an antagonistic pair. By utilizing this visual guide, educators can ensure students build a robust mental model of the musculoskeletal system, laying the groundwork for more advanced physiological studies and supporting long-term retention of domain-specific vocabulary.


