


0
Views
0
Downloads
Save
0 Likes
Creating Free Body or Force Diagrams Worksheet
0 Views
0 Downloads
Paste this activity's link or code into your existing LMS (Google Classroom, Canvas, Teams, Schoology, Moodle, etc.).
Students can open and work on the activity right away, with no student login required.
You'll still be able to track student progress and results from your teacher account.
Information
Description
What It Is:
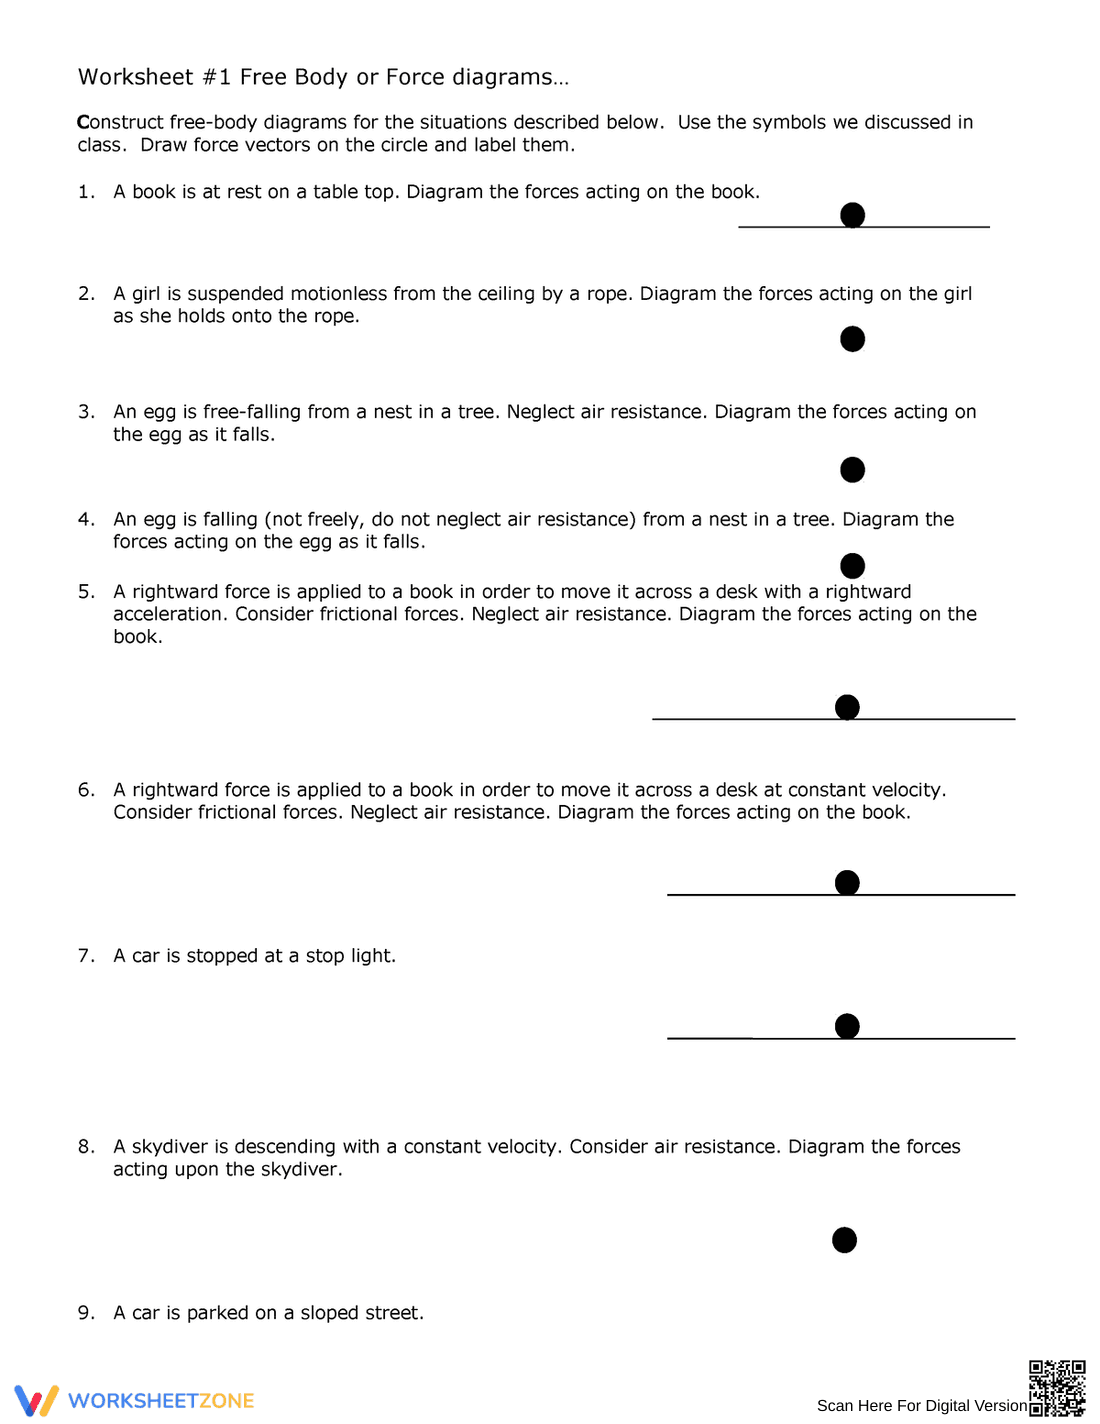
This is a physics worksheet focused on free body diagrams, also known as force diagrams. It presents nine different scenarios, such as a book on a table, a girl suspended by a rope, an egg falling, a car stopped at a light, and a skydiver descending. For each scenario, students are instructed to draw force vectors on a provided circle representing the object and label them, demonstrating their understanding of the forces acting on the object. The worksheet includes considerations like air resistance and friction in some scenarios.
Grade Level Suitability:
This worksheet is suitable for high school physics, specifically grades 9-12. The concepts of force, gravity, friction, air resistance, and acceleration, along with the ability to represent them visually in free body diagrams, are typically covered in high school physics courses.
Why Use It:
This worksheet helps students develop a strong understanding of forces and their interactions by visualizing them in free body diagrams. It reinforces the application of Newton's laws of motion and encourages critical thinking about different forces acting on an object in various real-world situations. It also allows students to practice labeling forces correctly and distinguishing between different types of forces.
How to Use It:
Students should read each scenario carefully and identify all the forces acting on the object. They should then draw arrows (vectors) originating from the dot (representing the object) to represent each force, with the length of the arrow indicating the magnitude of the force. Each arrow should be labeled with the appropriate force (e.g., gravity, normal force, tension, friction, applied force, air resistance).
Target Users:
This worksheet is designed for high school physics students learning about forces and free body diagrams. It is also beneficial for teachers looking for practice problems to reinforce these concepts and assess student understanding.